Category Archives: Topsoil Tips & Advice

The Benefits of Composting in Your Garden

Benefits of Composting

How compost can help your garden grow

Many people tend to think of compost as an environmentally friendly way to reduce household waste, and while controlling waste is, of course, fantastic, keen gardeners also benefit from using compost in the garden as it has a huge number of significant benefits.

Of course, if you are unable or unwilling to make your own, but still want to reap all the benefits of composting, then it is easy to purchase. Good quality compost is a fantastic way to give your garden a much-needed boost and to help it flourish.

So what exactly does compost do?

Improves soil structure

Healthy soil is usually a rich dark brown colour and has a soft and crumbly touch. This indicates enough air and moisture are within it and it contains enough energy to move freely. 

Adding compost to your soil will help it to get to this point and keep it healthy from there on. It also helps to neutralise your soil’s PH balance which is useful for plant growth.

Increases its ability to hold nutrients 

Compost is nature’s best fertiliser – it is essentially a group of organisms that live in the soil – bacteria and fungi as well as common garden creatures such as earthworms. 

These organisms help soil remain healthy, and the organic matter found in compost allows essential nutrients to be held in the soil which plants and flowers can then obtain. 

Compost also releases nutrients slowly over time so they don’t leach away, which can be the case when using certain synthetic fertilisers. Plants and flowers need a steady supply of nutrients in order to thrive, and this is what compost provides.

Uses less water

Healthy and fertile soil uses less water, and if compost creates healthy soil it should retain more moisture which means you don’t need to use as much water in your garden.

Obviously the larger your garden the more advantageous this is, but whatever its size, using less water is good for the environment, and less hassle for you too!

Keeps disease at bay

Some studies have shown that compost can help keep pests at bay, and where more sterile soil can eventually become overrun with these and eventually ruin your garden, compost will help to naturally reduce the number of these problematic diseases, keeping your garden safe and healthy. 

Compost is also good for keeping soil loose and easy to manage. Soil compaction can be an issue in soil that is not healthy. It also helps to inhibit erosion, and, if you are using clay soil, can promote drainage and aeration.

Composting has so many fantastic benefits which make it an essential product for most gardeners to keep their soil healthy, and give their plants and flowers the best chance of blossoming and flourishing each and every year. 

If you are looking for great quality compost, mulch or topsoil to improve your garden’s soil in preparation for summer, we offer a fantastic range, and if you need any advice why not contact our friendly team today

Make Your Garden A Wildlife Garden: How to Encourage Wildlife in Your Garden

Wildlife garden

How to encourage wildlife in your garden

Encouraging wildlife to take up residence in your garden is a great way to do your bit for the environment, and can help it flourish too. 

Even those with a small urban garden can use this space to invite natural wildlife to come in, and the sounds of bees buzzing and butterflies flitting from flower to flower is sure to have a positive effect on your wellbeing too!

So what can you do to turn your garden into a wildlife garden? Here are some fantastic tips to encourage wildlife to come in. 

Look after the bees.

Anyone interested in wildlife and the environment will probably be aware that the number of bees in the UK has been rapidly declining over the last few years, with at least two species of bee becoming extinct in the 21st century. 

Bees feed on the nectar of flowers so why not give them an easy meal or two by planting some wildflowers in your garden? We offer a range of high quality wildflower turf and seed which will attract bees into your garden.

Bees are excellent pollinators so play a key role in producing many of the foods that we enjoy, so it is only fair that we give them a helping hand and do everything we can to conserve these lovely creatures -the beautiful mix of colours and textures of wildflowers in your garden is a fantastic added bonus too.

 Help the hedgehogs.

Hedgehogs are another delightful wild creature that are sadly in decline. Luckily there is plenty we can do to help them. Hedgehogs are always on the lookout for food sources as well as to find a good spot to settle down for the night, or even search for a mate. 

If you have a lot of land you may find that hedgehogs are happy to wander through your garden, but even in an enclosed space you could create a gap to allow hedgehogs to roam in and out of your garden freely. 

Hedgehogs love to feast on mealworm, and sunflower hearts, but you can also buy specially made hedgehog food, and they are even partial to meaty dog food and unsalted peanuts too! 

Leaving out water for hedgehogs to drink is also helpful, but remember that milk can actually cause them upset so don’t try to coax them in with that. 

Creating sheltered spots for hedgehogs to live in can be created or bought and will keep them safe and protected from predators. Another important point is that slug pellets and weed killers can be dangerous to hedgehogs if they ingest them, so using organic products, composts and fertilisers will keep them safe as well. 

Boost the butterflies.

Butterflies are attracted to colourful flowers, so include plenty of them in your garden to attract beautiful butterflies and other insects and bees. 

While butterflies tend not to be too fussy, if you want to give them the optimum environment, planting clusters of small, tubular flowers or flat topped blossoms are ideal as their shape makes it easy for butterflies to land and feed on the nectar. Including flat stones in sunny areas of your garden are also attractive to butterflies who enjoy resting on warm spots after enjoying a good meal!

Care for the birds.

With spring on it’s way, now is the ideal time to think about including a birds nest box in your garden. Even the smallest gardens can accommodate one, and in doing so you will be helping to conserve birds species, giving them an ideal, safe and secure place to nest and breed as well as being a truly joyful experience if birds do choose to take up residence and lay their eggs in your nest box. 

Include the insects.

Insects are an important part of our ecosystem, and attracting insects to your garden can keep it flourishing as they feed on pests that may otherwise destroy it. 

They also naturally fertilise soil, keeping it healthy, and ideal for growing plants and flowers. 

Avoid use of chemical laden fertilisers and allow your lawn to grow a little longer, and you can encourage a variety of harmless insects into your garden providing them with much needed shelter, which is particularly important over winter where they look for suitable spots to hibernate. 

By making little, inexpensive and simple changes you could easily transform your outside space into a thriving wildlife garden, which will not only bring you satisfaction in the knowledge that you are doing your bit for the planet, but will also bring colour and life to your garden all year round. 

Gardening Tips for February

Garden patio bench with snow

Useful tips for gardening in February

You may think that gardening is only an activity you can get engaged with in the warmer months. However just because winter is upon us, it doesn’t mean that you have to pack your gardening tools away, or leave your garden until the sun comes out once more.

In fact, upkeep of your garden should continue all year round, and in winter it is a good idea to keep on top of pruning and weeding, as well as preparing your soil and sowing seeds in good time for spring. If you have left your garden to become a little unruly since the summer, and aren’t sure where to start, simply take a look at these tips for gardening in February, and make sure you garden stays looking great all year round.

Protect your plants

When a cold snap is just around the corner, it’s a good idea to make sure you take care of the more delicate plants in your garden. If you don’t they may become damaged and difficult to bring back to life. In fact, even in mild winters, or protected areas of your garden, it is a good idea to gather your most tender plants and bring them inside.

If you don’t have a suitable area to keep plants in your home, there are still measures to be taken to help them survive harsher outdoor conditions. Wrap terracotta pots in bubble wrap or fleece to stop them from cracking, group them together so they won’t topple in strong winds and move them to the sunniest spot in you garden to allow them to warm up when the sun does shine.

Keep an eye on any shrubs and small trees to check that they are not becoming loose in the soil and tend to them if needed, in order to secure them again. You can erect a windbreak to keep them out of the wind and mulches are useful to keep roots from becoming damaged in the cold. Mulching with compost is also useful to give plants a boost and get them ready to regrow and flower in spring.

Give your garden a good tidy

Winter is the perfect time to tidy up a garden that may have become overgrown or untidy. Use this time to prune plants such as rose bushes and Wisteria. Cut back any branches of trees that might have grown too much or that block out the sun. Cut old foliage and any damaged or diseased stems of plants. Give sheds and fences a new lick of paint, pull up weeds that may have grown in between cracks in decking or paving and treat with a weed killer.

Wash empty pots and get rid of slime and debris, tidy up sheds, and clean your patio by giving it a good scrub or by using a pressure washer.

Plan ahead

If you wish to grow certain plants and flowers in your garden you need to do the preparation now. Fruits and vegetables can be grown early but you should prepare the soil in advance. Place newspaper or cloche over the soil to warm it up for a few weeks, and keep it loose and crumbly with regular raking. When you sow use a good quality topsoil to give your plants and flowers the best chance of growth. Start sprouting potatoes now, sow peas for an early crop, plant fruit bushes in a sheltered position and use a good fertiliser once a week to keep ensure they have all the nutrients they need.

Spend time planning how you would like your garden to take shape and order your seeds now. Spring flowering plants can also be purchased now, in fact you can order many plants and seeds over winter now to avoid a rush later.

Look after your lawn

It is easy to stop caring for your lawn during the colder weather however it is a good idea to keep it trimmed and make sure you don’t walk on lawned areas if it has been snowing as this could damage the grass underneath it. If you are planning on growing your lawn for summer you may wish to start looking at lawn turf or grass seed and preparing your garden for laying this now too.

Keeping your garden in good shape this winter is a great idea, and if you put a little bit of effort in now you are sure to reap the benefits when spring arrives.


5 Ways To Warm Up your Garden

warm your garden

Get Creative This Winter To Give Your Garden A Cosy Feel!

With the temperature dropping in recent weeks you may want to keep warm and stay inside. However there is no reason why you can’t make use of your garden all year round, and with these great tips you can still enjoy your outside space in the colder months.

1. Candles and Lanterns

Candles and Lanterns are perfect to give your garden a cosy feel, and are fantastic to use whatever the weather. Bring out some tall candles in calmer days and place them around your garden. You can use glass jars to keep them steady and protect them from the wind, or simply have them next to plant pots, on the edge of steps, or use floating candles if you have a pond. You can choose all white to keep it classy, or use a variety of coloured candles to brighten up your garden and give it a fun and magical feel. Colourful lanterns can also bring warmth to your garden and give it a lovely enchanted look.

2. Fairy Lights

Just because the festive season is over doesn’t mean you have to pack away the fairy lights just yet. Fairy lights are another great way to give your garden some sparkle during the winter months, and because it gets darker earlier they will have a great effect in the early evening. If you can’t plug your lights inside and lead them outside, why not invest in some solar lights? Despite the lack of sun, a good set will still charge during the day and then will light up your garden from dusk without you having to do a thing!

3. Winter Plants

Despite the cold, there are many plants that will thrive during this time of year. You can find a huge variety of plants that will do well in the cold, and for instant gratification choose from winter flowing plants such as the common pansy, or the more unusual  Nepalese paper plant ‘Jacqueline Postill’ (Daphne bholua) which produces delightful pink flowers at this time of year. Berries and snowdrops are also great choices. It is also a good idea to pay attention to your soil at this time of year too. If there has been a lot of frost you may wish to thaw it out by placing some black plastic sheeting over the top. Turn your soil over regularly to keep it loose and add some soil conditioner to keep it in top condition.

4. Colourful Pots

Investing in some colourful pots at this time of year is a fantastic way to keep your garden cheerful all year round. There are plenty of garden centres and shops that sell a variety of coloured plant pots, or you can get creative and paint your own. Regardless of whether it is the right time to grow plants in them, this instant splash of colour will give your garden warmth and vibrancy whenever you look out of the window.

5. Outdoor Heaters

While spending long evenings sitting out in your garden may not be practical at this time of year, if you invest in a patio heater there is no reason why you can’t enjoy it. A fire pit or chiminea is another great option to keep you cosy, providing you use the right logs or coal. So invest in these if you fancy doing some winter star gazing in the evenings, or even invite people over for a winter BBQ -why not?!

So there you have it – with these tips you can keep your garden looking great, and more importantly, usable whatever the temperature. Wrap up warm, grab some blankets and get the fire going and you can enjoy your winter sanctuary until the sunshine reappears!

What is Topsoil & What is Topsoil Used For? – A Comprehensive Guide

what is topsoil?

So What is Topsoil?

Topsoil is the very uppermost part of the earth’s surface and is only around 2-12 inches thick. Topsoil is formed when rocks become altered over many years, causing them to break down into very small parts due to weathering or chemicals. As this process occurs other organic matter that naturally occurs on the earth’s surface, for example, dead animals, leaves and other vegetation become mixed into it which means that when the topsoil is formed (which can take over 100 years). The soil contains a great many organic nutrients and minerals which support life. Often people add other materials such as manure to topsoil to make it even more fertile and so it can be used for multiple purposes.

Topsoil has become increasingly difficult to cultivate in recent years as pollution can often contaminate the soil and the slow process needed for it to form. This means it has become increasingly important to monitor how much topsoil gets removed from the earth’s surface intentionally and used for commercial purposes.

What is topsoil used for?

what is topsoil used for

Topsoil is widely used in gardening and is very efficient in helping to improve the quality of soil on a particular patch of land. It can also be used to level out uneven ground or lawns. Using topsoil on your land or in your garden will provide plants and flowers with the right kind of nutrients needed to flourish. If the existing soil in your garden is poor then covering it with a layer of topsoil should allow anything you plant to grow well. The rich soil is packed with good nutrients, minerals from rock and sand, and organic matter from decayed plants and animals, which will provide a source of food for your plants and allow them to take root.

What is screened topsoil?

There are plenty of variations of different types of topsoil which are used for different purposes, generally however, they are usually divided into two different categories; screened and unscreened.

what is screened topsoil

Screened topsoil is created using a specific process where the soil is filtered through different sized meshes when it is being made. Customers can choose how fine or chunky they want the topsoil to be, for instance choosing between particle sizes of say 3/4 inch or 5/8 inch and so on. The benefit of screened topsoil is that is is a consistent size which allows for optimum water flow and distribution of essential nutrients which will keep your garden healthy.

Unscreened topsoil does not go through the meshing process and therefore tends to be coarser and more uneven, because of this it is therefore a cheaper alternative, however doesn’t provide the same quality and benefits as the screened topsoil does.

How and where to buy topsoil

At Bury Hill we have a large selection of different topsoil’s, suitable for all purposes. Remember to do your research beforehand and understand which kind will work best for your needs. If you are using topsoil to lay a new lawn you will need at least a 4 inch layer all over, and if you are planting new beds you will need at least 8 inches of topsoil to ensure optimum growth. Use our topsoil calculator to work out home much topsoil you need for your gardening project.

how and where to buy topsoil

If you have any questions about any of our topsoil’s, please feel free to give us a call. We  have different grades of topsoil, Premium grade topsoil  which is the most expensive but will not contain any weed seeds and is extremely fertile. We also have a Bury Hill General purpose topsoil, which is a standard topsoil and commonly used for beds and lawns.

CONTACT US FOR MORE INFORMATION OR FOR A FREE QUOTE. 

Why, How and When to Aerate a Lawn in the UK

Aerating a lawn in the UK

What is aeration?

Aeration is a process to keep your soil healthy in order to give your lawn the best chance of flourishing. It involves making small holes in your soil which therefore facilitates the absorption of air, water and essential nutrients into it. Aeration makes it easier for your grass roots to take up these nutrients and therefore giving them the best chance of growing healthily. Aeration also allows for the old carbon rich soil which has become compressed and dense to become light, oxygen rich soil which makes for a great base, stimulating the grass roots and encouraging them to grow.

Aeration has many benefits:

  1. Relieves surface compaction, lessening the gradual build up of thick that below the lawns surface.
  2. Stimulates new root growth.
  3. Helps with lawn drainage and absorption.
  4. Increases the uptake of nutrients.
  5. Helps create a better balance and gaseous exchange between the soil and the surrounding atmosphere.

Why do we aerate?

Because often grass or lawn thatch can become built up, aeration is crucial. If your lawn gets heavy use the soil can easily compact, it also may end up with a thick thatch. Without aeration nutrients such as fertilisers or essential water may not penetrate the soil properly and therefore will be unable to reach your grass roots. Making time to care for the soil in your garden properly can make all the difference when it comes to having a beautiful, healthy and lustrous lawn this season.

when to aerate a lawn uk

When to aerate a lawn?

Knowing when you should aerate your lawn is vital. Different weather can affect your soil in different ways and therefore choosing the right time to aerate your lawn is important in order to achieve optimum results. So when should you aerate your lawn in the UK? The best time is during the growing season, either in early or late spring or autumn, here the grass has the chance to heal and will be able to naturally fill into any patchy areas which may occur after you remove the soil plugs. Very hot weather can make aeration difficult due to dry soil, and similarly in the colder months, hard, frozen soil becomes impossible to penetrate effectively.

How to aerate a lawn

The process or aerating a lawn is simple. There are two tools you can use which will help you. Choose from a Plug Aerator or a Spike Aerator. The Plug Aerator, as expected, will remove a plug (or core) of soil from your lawn leaving a hole. A Spike Aerator will simply spike holes into the existing soil. You can easily rent either of these machines from your local garden store or home improvement centre.

How to aerate a lawn

Before you begin firstly use your lawn mower to crop the grass very short, it is also important to ensure the soil is thoroughly moist. Trying to aerate dry soil could cause further problems and compaction. Go over each area more than once, and in different directions for thorough coverage. If you chose to use a Plug Aerator remove and dry out the plugs of soil then spread them evenly over the lawn once the process is complete.

Make sure that you aerate to the right depth – simply aerating a compacted layer won’t help, you must go deeper than this to ensure the soil is penetrated properly, you are trying to make deep holes with uncompacted walls.

After you have finished aerating your lawn, you should cover it with new grass seed and then take particular care to water, fertilise and mow back the grass regularly. Repeat this process at least once a year, if not more, dependant on your garden usage and you will reap the benefits of having a strong and healthy looking lawn.


If you are thinking of growing a lawn, here at Bury Hill we have a wide selection of grass seeds and lawn turf available for all purposes, be it small gardens to sports pitches. Our team will be more than happy to help advise on the best type of turf or seed for your project, simply CONTACT US FOR MORE INFORMATION OR FOR A FREE QUOTE.


How to Lay Lawn Turf – A Comprehensive Guide

how to lay lawn turf

Creating a new look for your garden can be a hassle free process. If you start at the right time of year, and plan carefully, you can have a stunning outside space in no time. One of the elements that will instantly give your a fresh look is by laying new lawn turf. It’s a great option for families if you have children or pets and don’t want to keep them out of the garden while seed grows. It’s a slightly more expensive option than grass seed, but the results are instant. The aftercare is also less strenuous in that you don’t have to worry about weeds growing and ruining the look of your new garden. The experts at Bury Hill have written a comprehensive guide to lawn turf, to ensure you can have the lawn you’ve always wanted.

When is the best time to lay turf?

The best time of year to lay lawn turf is in the spring and mid autumn. For the best results soil should be warm and moist so autumn rain and april showers work well in creating the perfect conditions to lay it down. Of course if you are keen to get your new garden look outside of these seasons, then it is possible to lay lawn turf at any time of year, providing you ensure that the soil is kept in good condition and watered regularly so it doesn’t dry out and become loose. The summer season however is not a good time to lay the turf as warmer weather will mean the soil dries out putting stress on the turf meaning that it’s possible the roots will not take. Bury Hills drought turf is a good option if you plan to makeover your garden in drier weather as it is designed to require less water.

Where can you buy lawn turf?

Here at Bury Hill we sell quality lawn turf for all gardening and landscaping projects. Whatever the size and shape of your garden our expert team can advise on the best product for you. We specialise in lawn turf for domestic family lawns, parks, commercial and industrial use, as well as verges and amenity areas. It couldn’t be easier to buy your lawn turf from us. You can order directly from our website, and all our prices include delivery right to your door. Use our turf calculator to work out how much turf you need for your garden or landscaping project. All of our lawn turf is delivered direct from our cutters within 1 day ensuring you have the freshest lawn turf.

Preparing the soil

Preparing your soil in the best way is one of the most important steps if you want to achieve the best results for your lawn turf. To do this make sure the soil is devoid of any stones or weeds and loosen it with a fork so it is broken up and soft, with no lumps or hollows. For best results try to do this to a depth of around 25cm. Use a rake to even out the soil and ensure it is finely combed, then rake in a pre-turf fertilizer to ensure best possible growth. Our Pre-Turf fertilizer is very high quality and is easy to use.

How to lay lawn turf

laying your lawn turf

Once the soil has been prepared you can now go about laying the turf. Ensure you do this in several steps and take your time to make sure the turf is lying evenly and there are no gaps:


Firstly take a roll of turf and place it on the far edge or corner of your mapped out area. Gently unroll the turf being careful not to damage it. It is important to make sure each roll is positioned as close as it can be to the previous roll, do this while being mindful not to pull or stretch your turf. Whilst laying your turf it is a good idea to stand on boards as this will compress the turf into the soil as well as ensuring you don’t damage or indent it. Once you have laid all your turf and covered the desired area, use a roller to smooth it out. The next step is to simply trim the edges of your lawn with a sharp knife. Finally all that you need to do is then give your newly laid turf a good watering to ensure you achieve the best results.

Maintaining your grass

watering lawn turf

Aftercare is as important as preparing the soil and laying the lawn turf correctly. It is imperative to regularly water your lawn to ensure that it doesn’t dry out. Do this for at least 3-4 weeks, or more if the weather is particularly dry. Watering your grass regularly gives the roots the best chance of developing. Once your grass is 5 cm tall, and you have good weather conditions, you can start mowing your new lawn. Make sure you trim it lightly, with a sharp bladed mower, cutting to around 2.5 cm.


Re-designing your garden is a hugely satisfying project. At Bury Hill we have great quality lawn turf available for all purposes, simply get in touch with one of our dedicated team members for more information or a free quote.


How to Keep Fire Logs Dry In Winter

Stack_of_logs

Using firewood to keep your home warm in winter is a good alternative to central heating. They often work better than anything else available, heating up your living room quickly and efficiently. You should see a good drop in your gas bill as well!

However, storage is often a big problem. It can be a little challenging to keep logs dry in winter. So here at BURY HILL LANDSCAPE SUPPLIERS we have made a guide that will give you a quick overview of the best way to store logs, keeping them usable for the duration of winter. Having dry logs makes a lot of difference to the amount of heat your wood burner will produce, so ensuring they are as dry as possible is extremely beneficial.

 Split the Wood

Depending on how you get your hands on your logs, you may want to split the wood first. This means splitting your firewood into separate sections, which speeds up the drying process. This is due to an increased surface area being exposed to the air. Alternatively buy logs that are already split, this halves your work load and getting them from a reputable supplier means you will have the best quality wood, split in the correct way.

wood-splitting

Contact Bury Hill for a quote or advice on split Hardwood logs – 01306 877540.

Allow Drying in the Open Air

 If you’re lucky with the weather, we advise that you let your logs dry completely in the open air before storing them. The wind is a fantastic natural element that can help dry your logs out. It will speed up the drying process, ensuring your logs are in the best position possible before covering them for protection from the elements.  It is important however to ensure that you time this right, the last thing you want is your logs sitting outside uncovered when a rainstorm comes. If your logs get damp then it is a long process to dry them out again.

 Use Wooden Pallets for Storage

wooden-pallets

Keeping logs dry is more than just about protecting them from the elements above such as snow and rain. You also need to keep them dry from the bottom – that’s why we advise investing in wooden pallets, as it’s the easiest and cheapest way to achieve this. Many garden centres will give these away for free, so why not ask around in your local area? Using wooden pallets ensures that the logs are kept off the ground but also have plenty of circulation from underneath. Ventilation is key to keeping your logs dry which is what makes wooden pallets the ideal base for your log pile

Stack Properly

Stacking can take a little practice to get just right, but it’s an important part of the process. Your stacks should be around a metre tall and your pile should not be more than one log-length in depth.

log-stacking

The logs need to be stacked in such a way that you allow for plenty of circulation. Leave gaps between the logs and make sure none are left covered. You also want to store each layer in the opposite direction of the next one. This will ensure that the logs will have the best possible ventilation they can and ensure that they burn well and create the most possible heat.

Leave a Space

If you are looking to stack your logs next to a wall or shed, make sure you leave plenty of space, as this will allow for air circulation. This is a very important step that plenty of people forget. Stacking your logs up against a wall will often result in wet logs and termites, as well as other nasty creatures. Try to leave a 5-10 cm gap between the logs and the wall in order to achieve the best ventilation around your logs.

How to Use a Tarpaulin Cover

One of the biggest mistakes you can make is covering your logs completely. This will seal the entire pile and stop air circulation, allowing moisture to damage your supply, which will render it useless for burning. Make sure that the sides remain uncovered for proper aeration. If possible, build a shelter that can sit over the top of the logs, again ensuring there is a large amount of space for air to circulate in.

log-tarpaulin

Remember before you start using the fire logs, bring them inside at least a day in advance. Keep them in a dry area of your home and they should be good to go the following day. Hopefully if you follow all of these steps you will end up with the perfect burning logs that create copious amounts of heat.

Make sure your have a large supply of logs ready for the winter. Order your logs at Bury Hill online or over the phone. At Bury Hill we sell Hardwood logs perfect for; open fires, multi-fuel stoves, pizza ovens and fire pits. We also sell Coal and Smokeless fuel.

 Contact us today for advice and quotes – 01306 877540


Storm Water Solutions That Can Enhance Your Garden

Storm water is the worst nightmare of many home owners, giving rise to different problems with the drainage system. But did you know that there are solutions that will allow you not only to improve your drainage, but also to enhance your landscape and protect natural waterways?

Garden-Flood-Rain-Gardens

Identifying the Problem

The core of the problem with storm water lies in the fact that you have to face a sudden arrival of a disturbingly large quantity of water and different objects that come with it. “Your storm water drain can be blocked due to a number of reasons”, we learn from the reputable Sydney-based Permanent Plumbing Solutions, “from tree roots to material build-up.” As we all know that prevention is better than cure, you’ll be best advised to take measures that will allow abundant water to gradually sink into the soil, which will reduce flooding, rather than pay for costly repairs after almost every storm.

Addressing the Issue

There are different features you can build in your yard that can help you alleviate the impact of storm water, but let’s focus on the three most common solutions. You can landscape your ditches as swales resembling tiny meadows or creek beds, redirect your gutter water to flow into a rain garden, providing a lovely habitat for birds and butterflies, or construct a permeable paving to allow excess water through it.  These measures will not only enable you to better handle runoff water, but they will also reduce pollution, as oily residue from cars, allowing it to filter out naturally and not end up in streams or lakes.

Swales

Swales are depressions following the outward edge of the base of a slope, redirecting water in a desired direction. They ensure that runoff sinks into the soil, filtering it along the way. You’ll need fast-draining soil to allow plants on its slightly sloping banks to absorb a significant quantity of this water.

Swale-Rain-Water-Gardens

Laying a ­perforated pipe in gravel underneath will send excess water to a dry well, helping you deal with heavy water flow. If carrying gutter water from your home to a dry well is what you had in mind, even a small swale would do the trick, yet if you want to divert water around a low-­lying house, you’ll need a considerably larger one to run along the foundation of an elevated surface above it.

Rain Gardens

If we think of a swale as primarily a travel route for excess water, then a rain garden should be seen as its destination. It is basically a shallow catch basin in shape of a flower bed that allows water to pool during a storm and percolate into the soil afterwards. A fast-draining soil mix is required to encourage water to sink in and ensure lush plant growth. Runoff can go into your rain garden from a swale or pipe, or simply from a sloping yard. They are suitable drainage spots for a steeper slopes than swales can handle.

Having said that, you should plant it in an area that dries out quickly, rather than placing it in a low-lying saturated spot. When we talk about the plants suitable for this purpose, species that tolerate wet conditions should go in the center, surrounded by those that are tolerate occasional standing water, while the plants that prefer ­drier soil should be placed at the furthermost edges.

Permeable Paving

Driveways, walkways, parking lots and patios can all be built of permeable paving that won’t puddle since runoff will seep through it. To this end, we use materials with gaps that let water sink into the quick-draining layers of underneath, so that the top surface remains dry, while excess water is successfully dealt with. If you decide to construct an eye-catching gravel driveway, for best results, you should first install a grid made of eco-friendly materials (such as 100% recycled plastic waste) and then lay gravel over it, as this will keep gravel in place and cut down maintenance expenses.

By the same token, if a sustainable grass parking lot is what you have in mind, the aforementioned eco-grid will make for outstanding turf protection.  Permeable paving is suitable both for even surfaces and subtle slopes, offering not only an effective way to handle runoff, but also letting you enhance your landscape while safeguarding the environment.

Author Bio: Lillian Connors is a blogger and home improvement enthusiast ever so keen on doing various DIY projects around her house and passionately writing about them. She is also an online marketing consultant, closely collaborating with a number of companies from all over the globe.

care-for-garden-tools

Five Tools Every Gardener Needs

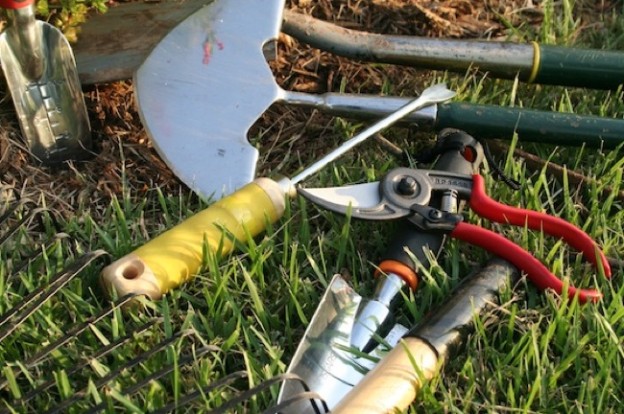
Even the expert gardener is as good as his tools. If you want to make the best of your garden, we advise to get to the nearest gardening suppliers in the area and get yourself the following five tools for gardening. They’re a fantastic starting point for any budding gardener and you won’t get very far without them!

Spade

The spade is the basis for your gardening arsenal. Any landscape supplier will have these in stock. Invest in a solid brand that’s known for quality. The spade is essential for digging holes, edging beds and removing sod, in addition to a range of other uses. 

Garden-Spade-BuryHill

Digging Fork

Getting yourself a decent digging fork from your gardening suppliers will result in a massive thank-you note from your back and shoulder muscles. Make sure you get a heavy-duty edition that can handle pretty much anything.

Digging-Fork-BuryHill

Leaf Rake

The trusty rake is one of the most underrated gardening tools, but nevertheless one that you can’t really go without. If you try and tackle autumn without a leaf rake, you may not be suited for this gardening business after all!

Leaf Rake-BuryHill

Hand Trowel

When it comes to planting small vegetable and herb gardens or digging out those annoying patches of weed, there’s no tool that beats the hand trowel. It really pays to invest in quality – forged stainless steel combined with a rubber grip will give you a solid product that will last.

Gardening Gloves

This one may come as a slight surprise, but it’s an important ‘tool’ nonetheless. It makes your job much easier and you’ll become a much more efficient gardener. Not to mention, your hands will thank you for it. It’s surprising just how much damage you can do to those fingers when working in your average backyard.

Gardening Gloves

There are several kinds you can get – from washable synthetics, latex-coated gloves, to your heavy-duty leather gloves. These all cater to different requirements. It’s advisable to get all three types if possible, as they will all come in handy (pun intended!).

Final Tips

Finally, there are several final tips we want to give you that apply to all of the tools we’ve mentioned thus far. Firstly, make sure you try them. You may look a bit strange while you’re in the shop, but try to mimic the actions you would do while in the garden. This will give you a good idea of the grip and feel of the tool and if it’s a good fit for your hand.

You should also ensure the grip is made of high-quality materials. For example, if you’re going to go for wood, make sure it has a solid finish and that quality isn’t being disguised by a paint job (a common tactic). Alternatively, go for metal-coated handles. Words like ‘stainless steel’, ‘single forged’ and ‘carbon steel’ are all indicative of quality materials.

Finally, you should always ensure you take care of your garden tools. Store them properly and don’t leave them at the mercy of the elements. If you do this, you will enjoy using your tools for years to come.

Contact Bury Hill Landscape Supplies Ltd. on 01306 877540 for more information on premium grade topsoils and other landscape gardening supplies.

Visit Home and Garden Listings for a wide range of gardening tools suppliers.