Tag Archives: landscape supplies

How To Use Railway Sleepers In Your Garden

Garden stairs made from railway sleepers

If you are looking to revamp your garden in time for spring, one of the easiest and most transformative ways to do so is by thinking about how you can neaten up your current space, create new areas for seating and planting and get it looking great in time for the warmer weather.

Railway sleepers are a fantastic and cost-effective way to create a brand new look for your outside area and work well in gardens of any shape or size.

What are railway sleepers?

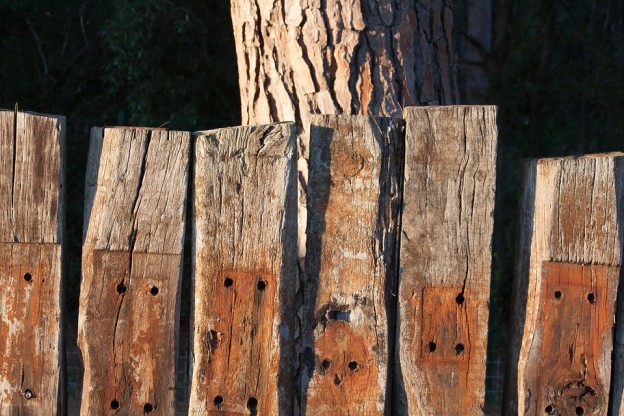
Railway sleepers are used to help support the bottom rails in train tracks making sure they remain correctly spaced as well as providing support so that they stay upright. When railroad tracks were first laid railway sleepers were all made from wood, though now concrete is often used instead.

Of course, you aren’t planning to lay a railway track in your garden, so what are they used for here? Because of their shape and structure, railway sleepers are perfect to use in the garden to help landscape the space. Wooden railway sleepers can give your garden a sleek, designer look, without extensive effort or expense.

How can you use wooden railway sleepers in the garden?

Railway sleepers have many great uses. Here are some ideas of how you could use them to create features and separate areas in your outdoor space.

Raised flower beds

Using sleepers to create raised flower beds can give it a different dimension and add interesting shapes and beautiful colours too. For a more unique look, mix more weathered sleepers with newer ones to create contrast and exciting lines.

Retaining walls

If you have an area you want to separate, you could use railway sleepers to create a retaining wall to fence it off while also adding texture. So if you have a pool area or a dining or BBQ area, you can terrace your garden with railway sleepers and create different spaces for socialising and entertaining.
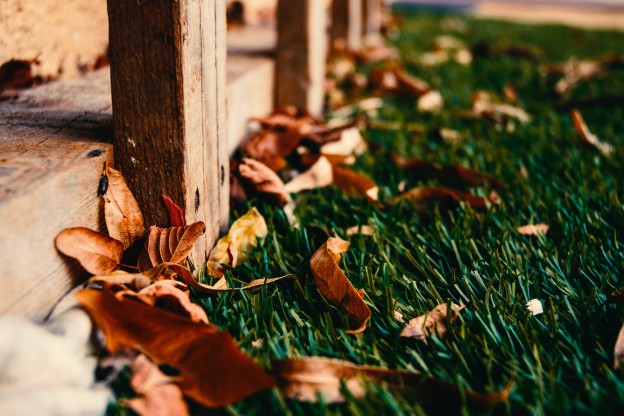
Garden pathways

If you want to create smart edges around your garden path, railway sleepers are the ideal material to give a more defined look. If you don’t have a garden path yet, you could create the outline using railway sleepers and fill in with gravel or bark. Larger sleepers could also be used to create the path itself using them as “stepping stones” to lead to a different area of your garden.

Feature steps, furniture, and seating areas

Wooden railway sleepers can also use used to create steps up to (or down from) raised areas of your garden. Similarly, railway sleepers can be used to create different seating areas in your garden too. Railways sleepers can be a great material to build simple wooden garden furniture such as tables and benches. You can even use railway sleepers to create eye-catching design elements such as a water feature complete with lush plants and pond ornaments, or even fish!

Decking & patios

Railway sleepers can also be used as an alternative to traditional decking boards. Sleepers offer a more rustic and arresting effect which can complement the plants and flowers growing in your garden.

Buying railway sleepers

There are lots of different options to choose from, and you may have to do your research to decide which type will look best in your garden, depending on your project and what kind of look you are going for. Aged wood can look more natural and blend seamlessly into your current garden design, or you could choose original reclaimed sleepers which will be treated to give them a longer lifespan. Newer varieties come in hardwood and softwood and a variety of different shapes and sizes. Hardwood sleepers tend to be better for building patios and retaining walls as they can withstand higher forces and footfall. Softwood sleepers are easier to manipulate.

Making the most of your railway sleepers

Should you decide to use railway sleepers in your garden, it’s a good idea to choose wisely as if the wood is in regular contact with moisture it may not last as long. Similarly, if you have to cut the wood to create certain features, the untreated core may then be more susceptible to damage. Treating timber can help to preserve the wood and extend its longevity.

Using railway sleepers in your garden is a great way to refresh the space, and there are lots of different ways this material can be utilised to significant effect. So if you are hoping to make your garden look fabulous in time for spring why not get planning and use railway sleepers to enhance your outside space?

At Bury Hill, we provide not only quality railway sleepers but also a range of soils, seeds and decorative stones to help gardeners create beautiful green spaces. If you have any questions or need any advice about your gardening project, give our friendly team a call on 01306877540 today!

railwaysleepers

Using Railway Sleepers in Your Garden: Project Ideas for Homeowners

Railway sleepers are those rectangular pieces of wood that you’ll see supporting railway tracks. They help the rails stay evenly spaced, upright, and in the correct shape.

But did you know that they’re also fabulous for creating stunning garden features?

Use them in your garden project and you’ll transform the look and feel of your garden, and perhaps even make the neighbours green with envy.

Here are some tips on how you can include railway sleepers in your garden, including project ideas, how to lay railway sleepers and where you can buy them.

Railway sleeper project ideas

Railway sleepers make a versatile, attractive and hard-wearing addition to any garden, adding natural texture and an eco-conscious feel to your outside space.

Here are our favourite ways you can use them.

1. Create a path

Make a great easy pathway on grass or gravel to add a touch of rustic chic to your outdoor space.

2. Build some garden steps

If you’re not a fan of bricks or stone, why not use those sleepers to make some steps instead? You can create the exact garden look that you want, they age really well, and they’re very straightforward to make.

3. Edge your veg

You could also use your railway sleepers to create an attractive boundary between your vegetables, flowers and the rest of your garden.

4. Build a raised bed

If you have poor soil quality, minimal space or you’d just like to keep your plants contained, use those sleepers to create a raised bed.

5. Craft a bench

Railway sleepers can also be used to create a stylish and rustic-looking bench which will fit perfectly in your garden design scheme.

6. Border your lawn

To create an effortless boundary for your lawn, lay some railway sleepers and then sit back to enjoy your handiwork!

Laying railway sleepers

Once you’ve decided which project you want to tackle, you can get stuck in! Here’s how:

Gather your tools

You only need a bare minimum of tools when you use railway sleepers in your garden. Usually, this involves a saw, a hammer, a screwdriver, wood screws, nails, a spirit level and safety equipment like gloves and goggles.

Clear the area

Before you start laying the railway sleepers, you also need to ensure the area is clear from unwanted vegetation and materials like rocks, roots and rubble.

Create your foundations

Next, you’ll need to prepare the area and then dig a shallow, level trench (unless you’re creating a piece of garden furniture), then add a bedding mixture to hold those sleepers in place. This will create solid foundations for your project.

Get building!

Once you’ve done this, you can start building your creation, using a combination of wood screws, nails or galvanised straps.  Make sure you use your spirit level to keep everything looking professional.

Finish off

Then it’s time to trim away any excess material, gently round the edges of the wood and treat using a wood preservative if required. If you’re creating a planter, this is when you’d add your high-quality topsoil before standing back and appreciating the fruits of your labour!

Voila! You’re done.

Where can you buy railway sleepers?

The good news is that it’s easy to find railway sleepers for sale these days. You can find them in most garden centres and also online.

If you’re looking for railway sleepers in Sussex, Surrey and London, look no further than our dedicated page.

Railway sleepers add a unique touch to any garden space, so why not dive into one of these projects and transform your outside space?

premium grade topsoil

What Causes Poor Soil Quality and How Can You Fix It?

Poor soil quality is every gardener’s worst nightmare.

There’s nothing worse than carefully planning and creating your perfect garden, only to produce vegetables, fruit or flowers that are weak, unhealthy and altogether disappointing.

Without healthy soil, all your gardening efforts could be in vain because healthy soil is essential for strong, nutritious, high-yielding plants that can resist pests and diseases and look beautiful in your garden.

If this sounds like your garden, don’t despair. Poor soil quality is a relatively common gardening problem. With some topsoil TLC, it can soon be improved.

So today let’s discuss how to spot if you have poor quality soil, why this happens, and how buying high-quality topsoil can help.

How do you know if your soil is poor quality?

Poor quality soil is usually very easy to spot because of its appearance, water drainage, the quality of your crops, and the presence or absence of weeds and other wildlife in your garden.

Soil texture

Soil that is hard to work, overly cloddy, loose, fine and sandy, ‘floury’, or filled with stones and pebbles are of poor quality. You’ll notice that any water tends to absorb water poorly and drain poorly. drain poorly and potentially flood.

Crop quality

If your tomato crop constantly suffers from blight or diseases, your cucumbers don’t grow as large as they should, or you suffer from other problems with crops or flowers, you are probably suffering from poor soil quality.

Local wildlife

Another surprising way you can tell if your soil is poor quality is by looking at the wildlife that visits. If there’s less healthy wildlife such as worms and bees around, and/or an excess of weeds, it’s time to improve that soil quality!

What causes poor soil quality?

Poor soil quality is often caused by one of these five factors:

  • Over-farming. Growing too many crops in one space year after year removes essential nutrients like nitrogen, potassium and phosphorus from the soil.

  • Infrequent crop rotation. Without adequate crop rotation, the demand for the same nutrients is high, leading to a long-term shortage and poor quality soil.

  • Draught or water shortages. Dry soil causes essential nutrients to gather in ‘clusters’ in the soil, making it much harder for those plant roots to reach.

  • Flooding or heavy rain. Soil that is overly wet will leach nutrients and essential topsoil can wash away.

  • Soil contamination. Overuse of toxins or chemical can contaminate the soil and reduce soil fertility.

  • New homes. A large portion of the healthy topsoil gets stripped away during home building, leaving behind poor quality soil that is less fertile.

How to fix poor quality soil

Thankfully, improving your soil quality and growing better plants is easy.

Pop to your local garden centre and select a high-quality topsoil that is high in nutrients and organic matter. (We provide topsoil and landscape supplies in Sussex, Surrey and London that would be perfect for the job!)

These topsoils are great for all garden purposes including improving your existing soil quality, and creating new beds, borders, raised beds or even lawns.

Topsoil prices vary, depending on what grade soil you choose:

  • Premium grade topsoil: Highly fertile, great structure and should be free from weed seeds.

  • General purpose: Great for creating new beds, borders and for laying new lawns. Comes in different screen size grades.

  • Economy: More affordable. Usually comes unscreened. Ideal for increasing the quantity of soil in your garden.

If you are struggling with poor quality soil, remember that there is hope. Simply invest in some high-quality specialist soils and you will soon produce a beautiful, healthy garden to be proud of.

blur-close-up-dried-leaves-713803

Autumn Gardening Tips: What to Plant and When

Even though the temperatures are dropping outside and the air is feeling ever crisper, the autumn is the perfect time to get most of your gardening done.

By putting in the work in your autumn garden now, you can enjoy homegrown veggies and a bloom of colour all year around. If you’re lucky, you might even get an extra early crop of your spring favourites.

It’s such a wonderful time to plant vegetables, flowers and trees as the soil is still deliciously warm and moist from the summer. This provides the perfect environment for seeds to germinate, for roots to form and for flavour to develop.

To help you make the most of this time, we’ve put together a list of our top autumn gardening tips. We’ve included a rundown of the vegetables and flowers you should include plus full tips on when to get them in the ground.

What to grow in the autumn: Vegetables

Onions

Onions are a tasty and versatile crop which are easy to grow and need little care. This makes them an excellent vegetable to plant this autumn.

When?

Anytime during the autumn.

Garlic

Just pop individual cloves in the ground this autumn or into raised beds and you’ll get a full head of garlic the following year. Easy!

When?

November is the ideal time, although you can plant any time until the spring.

Spring onions

Pop spring onions into your autumn garden to get ahead for next year. They’ll grow quickly and should be bursting with flavour and ready to pick by early spring.

When?

During September and October.

Perpetual Spinach

Grow perpetual spinach in your autumn garden and you’ll have a delicious crop to enjoy throughout the winter. Just make sure you keep picking leaves to ensure that your spinach keeps growing.

When?

Anytime during the autumn, before the first frost.

Broad Beans

Broad beans will help protect the soil in your autumn garden, add back essential nitrogen and, most importantly, taste utterly delicious.

When?

Sow in September or October.

Peas

Whether you’re keen to grow succulent peas in your autumn garden, or you’d prefer to grow beautiful, ornamental sweet peas for the flowers, now is the perfect time.

When?

Sow in pots of high-quality compost from September and October then pop into your greenhouse and cover with newspaper until the seedlings emerge.

Asparagus

Whilst asparagus does take several years to establish properly, autumn is the best time to get them into the ground. They make a wonderful attractive addition to your garden and taste absolutely delicious. Choose a spot where they won’t be disturbed and they have plenty of room to grow and you’ll have a crop within two years.

When?

Anytime this autumn.

Carrots

Plant carrots in the autumn, when the soil is still warm and they’ll have chance to grow deliciously sweet before the colder winter weather arrives. Be sure to protect these tiny seedings from the cold.

When?

Get them in the ground as soon as you can in the autumn- preferably 10-12 weeks before the first frost. If you’re using a greenhouse, you can sow them until November.

Spring Cabbage

Cabbage is a great source of nutrients which you can enjoy all year long. Choose fertile, well-drained soil which retains moisture well, add plenty of compost to keep your autumn garden nourished, and watch out for hungry slugs.

When?

Start in your greenhouse as in early September.

Kale

Kale is a hardy crop which won’t just survive the harshest of winters but will actually taste better because of it! Like cabbage, they need plenty of water and plenty of compost too.

When?

September or early October.

What to grow in autumn: flowering plants

Apple trees

The autumn is the ideal time to buy your apple trees and get them into the ground. Do this before the first frost strikes and you can enjoy their beautiful blossom in the spring. Soak the roots before you plant them, then plant into a sunny and sheltered position.

When?

Anytime before the first frost.

Daffodils

Plant brightly coloured daffodils in your autumn garden and you can enjoy some of the first flowers of spring! Buy a high-quality bulb, find a warm and sunny spot and plant into the soil or a container for the best blooms.

When?

October and November, before the first frost.

Hyacinths

For beautifully fragrant flowers in time for Christmas, plant those hyacinth bulbs into pots this autumn. They love a well-drained soil with a moderate amount of water and need to be popped into a cool dark place until the shoots reach approximately 5 cm. You can also plant directly in the soil in a place that receives full sun exposure.

When?

September or October.

English bluebell

Give your autumn garden a traditional English look by adding some bluebells to your autumn garden. They’re woodland flowers so demand plenty of shade and a rich, well-drained soil. When they flowering in April and May, you’ll also provide plenty of food for bees, butterflies and moths.

When?

During the autumn months.

Snowdrops

Snowdrops are a very popular spring bulb which demand moist and shaded specialist soil, but otherwise very little care. They’re also a pretty addition to any garden.

When?

Early autumn.

Roses

There are numerous varieties of roses which will add a classically beautiful look to your garden when they come into bloom between summer and autumn. Plant them now to give them plenty of time to get established. Make sure you protect them from wind and give them plenty of direct sunlight.

When?

During the autumn, before the first frost.

Get ahead this autumn by preparing your garden with a bounty of fresh vegetables and flowers which will deepen in flavour over the winter and provide something special when the spring comes back around. As always, give your garden a boost with Bury Hill premium grade topsoils!

child-friendly gardening checklist

Child-friendly gardening checklist for spring

It’s always exciting to see our gardens wake up once again after a long winter slumber. Spring is an active season for plants and gardeners in the UK. It’s a great time to inspire the next generation of gardeners to get outside and lend a hand to start growing their own flowers, fruit and veg.

Spring is a time for sowing seeds, watching wildlife and maintenance in the garden. A cool breeze may be lingering, but the garden still needs tending. We’ve put together the following guide, which lists child-friendly jobs, planting and activities by month to help your whole family enjoy your garden space.

March

Spring has sprung, busy days have begun!

Jobs to help with

Regular bug watches! Keep an eye out for slugs and snails

Cover bare borders with good quality topsoil

Rake up leaves and stick them in your compost bin

What to plant

It’s time to get summer bulbs in pots for summer colour

Sow herb seeds thinly in a tray or large pot

Sow lettuce seeds early indoors

Clear an area for wildflowers then spread a wildflower seed mix

Clear weeds to sow hardy annuals, like ‘Ladybird’ poppies

April

Prepare for April showers and sunshine

Things to do this month

Dig in a 5cm layer of good quality topsoil along borders

Help plant hanging baskets with bright blooms

Keep on top of weeds! Spread woodchip if needed

Continue your good work

Plant herb seedlings into separate pots or into the soil

Water your newly-planted fruit trees regularly

Add a soil conditioner before summer planting

Tie tomato plants to stakes for straight growth

Look out for frogs and frog spawn in the pond

May

A marvellous month for green fingers!

Now’s the time to

Find a good soil conditioner to break up heavy soil

Begin picking lettuce leaves for lunch!

Bundle herb sprigs into drawers for freshly-scented clothes

Spring sowing and planting

Sow sunflower seeds in a sunny spot outdoors

Pick a spot on a fence or wall for wallflower plants

Plant delicate indoor seedlings outdoors

Gather the first flowers of spring into a lovely bunch

3 ways to attract wildlife into the garden

Make a dark, warm hedgehog hotel using a wooden crate filled with leaves left turned upside down, with a small air hole and an entrance.

Place a small strip of carpet, or any other thick fabric, along a border to attract slow-worms. Often mistaken for baby snakes, these lizards are becoming an increasingly rare sight in the UK.

Create a makeshift bird feeder by stuffing melted fat or lard (an adult must be present) peppered with nuts and seeds. Finally, attach some rope to the container and hang it from a tree that is in plain sight from your house.

Make your garden look and feel great in time for spring with a nutritious topsoil and soil conditioner. All our premium grade topsoils and loams are blended using high-quality natural soils, selected sands and grits and organic compost from known sources, using local materials where possible. If you would like to place an order, visit our topsoil delivery information page.


Gardening tools on garden soil texture background top view

A Gardener’s Guide to Organic Soil Conditioner

As avid gardeners ourselves, we understand the satisfaction of discovering easy techniques and multi-purpose materials which help to keep our gardens healthy.

Here at Bury Hill, we select the best materials and complementary products that we would buy ourselves. One such material, one which you may not have used until now, is our organic soil conditioner: a great peat substitute and nutritional all-rounder that’s ideal for improving all types of soil.

If you have sandy soil which requires a lot of organic matter to improve its health, or temperamental cloggy wet clay soil which is a challenge all year round, soil conditioner is the perfect ingredient for your problematic beds and borders.

How organic soil conditioner is made

Good quality soil conditioner takes time to make, often with a 5-10 year process to utilise the nutrients stored in organic matter. Organic soil conditioner, as the name suggests, is free from artificial substances. It’s produced using 5-year-old composted waste matter, which is then screened to 10mm, making it easy to rake and spread. It’s this natural process which gives the conditioner its dark rich colour and near neutral pH level.

What are the key benefits?

When we talk about using soil conditioner in the garden, we’re simply referring to using organic matter.

Whereas manure provides some nutrients when combined with existing topsoil, however, soil conditioner is most effective when used to help ‘hungry’ plants.

Using your soil conditioner as mulch for your beds and borders – around trees, shrubs, flower borders and vegetable plot – will feed your plants, protect roots from cold snaps, lock in moisture and quash rapid weed growth.

How to use organic soil conditioner

For best results, spread a thick layer approximately 3-4 centimetres deep across the soil, using a fork or spade to incorporate the conditioner into your existing topsoil. This will instantly improve soil structure and fertility.

Due to its excellent nutrient content and water retention properties, soil conditioner promotes root growth while remaining a safe, sterile and stable organic matter to mix into your soil.

Tip: Ensure soil is moist rather than frozen when applying conditioner to a suitable area outside, preferably cleared of weeds beforehand.

Storing soil conditioner for longer-lasting performance

To maintain freshness and performance, store your organic soil conditioner in a dry, frost-free place undercover, away from pesticides and other garden chemicals. Always reseal the bag after use and avoid breathing in dust whilst spreading and storing your soil conditioner.

If you wish to place an organic soil conditioner order, please use our postcode finder to determine delivery and pricing.

Money-Saving Gardening Tips

10 Money-Saving Gardening Tips Part two

Last year, we took you through our top 10 money-saving gardening tips for our thrifty customers, from money management to researching your landscape supplier properly. However, a gardeners work is never done, and every season presents fresh opportunities to plan ahead! So, if you’re a beginner looking to cut costs or you need a tips top up, you’ve come to the right blog.

1. First, preserve leftover seeds

Seed packets may be small on size but many are big on price – the rarer or more popular the flower, for example, the more expensive they are to grow from seed. One of the easiest ways to cut down on seed expenditure every year is to store all your packets and leftover seeds (because you will always have some left over). Airtight plastic containers and glass jars are best, in a cool dry area away from direct sunlight.

2. Or, collect seeds to use again next year

Collecting flower and vegetable seeds at the end of their growing season will keep your seed collection topped up every year without having to head to the gardening centre. It’s not difficult to do, and some plant seeds are easier than others to harvest. Here’s a quick list of seed-saving vegetables to consider:

  • Peppers

  • Melons

  • Squash

  • Aubergines

  • Cucumber

  • Tomato

The smaller the seed, the bigger the hassle. But trust us, storing home-grown seeds is very satisfying – and frugal!

3. Learn how to take and grow cuttings

You don’t have to wait until a flower or fruit has lost its luster until you can start creating money-saving tips. As soon as plants begin to grow additional stems and shoots, there’s potential to take cuttings to grow on, sell or barter with friends. Here’s a quick tree cuttings guide, for example, to note:

  • Softwood cuttings: late spring, early summer

  • Semi-hardwood: midsummer after flowering

  • Hardwood: end of summer

4. Buy mulch in bulk

If you’ve decided that you’re a minimalist gardener – more interested in materials and practicality- consider using attractive materials in bulk like woodchip and bark to spread around the garden. Bulk buying is often a cheaper, easier and quicker solution for this type of garden project.

5. Shop comparitably

There are plenty of online comparison sites to choose from, selling everything from garden furniture and features to tools and lawnmowers. So shop around to find the cheapest prices on the market, alongside seasonal deals and sales.

6. Avoid overplanting

It’s easy to burden a big flower or vegetable bed with too many plants all at once to achieve a mature, lively scene straight away. As a rule, start with the bigger plants at the back and work your way forward in size until you reach the front, leaving enough room around each plant so they’re not constantly competing for light and nutrients.

7. Test your soil

If you go on a spending spree before testing your soil – what nutrients your soil lacks and its pH – your plants may not be suited to the conditions and will eventually wither, no matter how much you feed them. Test your soil and plan a planting scheme accordingly, like you would with shady and sunny spots in the garden. Consider using specialist soils to give your beds a boost.

8. Try natural, DIY feeds

We’re big fans of trying natural products in the garden when you can. Our pH-neutral organic soil conditioner, for example, is used by customers who want to improve their soil without potentially damaging chemicals.

Natural options to include in the garden include:

  • Making your own weed killer

  • Making your own compost

  • Save your grass clippings to use on your lawn as a DIY feed

9. Get free advice or speak with an expert

If you’re looking for extra ways to be creative in the garden, there’s a wealth of free knowledge online, at your local library or in free magazine supplements to get you started. Alternatively, as we pointed out in our earlier post, investing an hour or so with a landscaping expert to discuss your project to avoid mistakes is often good value for money over the long-term

10. Finally, use water wisely

Rather than add to your water bill during the summer when tending to your garden, collect water from other sources where you can. Installing a water butt, or leaving open containers around the garden to collect rainwater, is quick and easy. Additionally, watering directly on the soil rather than higher up on the leaves ensures water goes to where it is needed and adding two to three inches of mulch to your soil locks in moisture for longer.

For more even more evergreen tips on how to keep your garden looking great for less, revisit our first money-saving blog.

If you’re interested in any Bury Hill product or service listed in this blog, please call our team on 01306 877 540 for more information, or use our postcode delivery finder to receive an estimated price for your order.