Tag Archives: gardening tips

Mixed Race Couple Planting Rooftop Garden Together

6 Simple Tips for Urban Gardening

Urban gardening is awesome.

It allows you to grow delicious and nutritious fresh vegetables and herbs in the smallest of spaces, and you’ll have so much fun whilst you do it.

Whether you’re looking in bring a splash of greenery to your balcony or window box, or you have a tiny yard that you want to make productive, you’ll love how easy it is to grow your own with urban gardening.

You’ll also save money on groceries, reduce your carbon footprint and do your bit for sustainability. What’s not to love?

Here are our top tips for getting the best out of your urban gardening project.
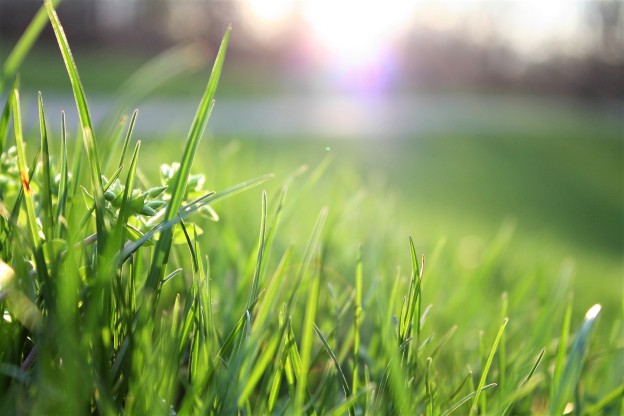
1.    Find the sun!

 Before you start creating your urban garden, first think about how many hours of direct sunlight your growing space gets each day. Your plants need the right conditions to be as healthy and productive as possible.

Based on this information, you can then choose the right plants to grow in your space. (Check the back of your seed packets if you’re unsure.)

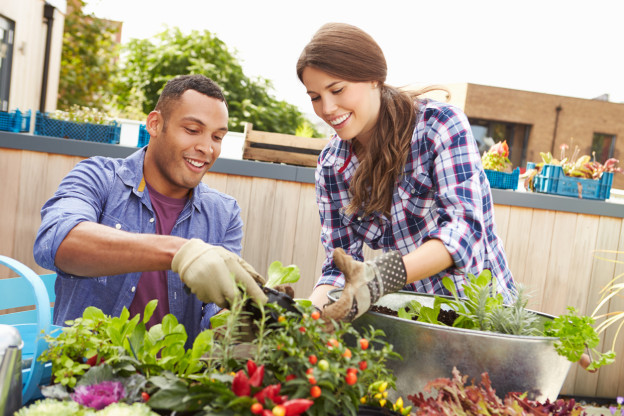
2.    Use containers or raised beds

Containers and raised beds are great options for beginner gardeners, especially if you’re working with small spaces like balconies, city gardens, and small backyards.

You’ll have more control over your soil, you’ll better protect your baby plants from the elements and you’ll be able to keep producing vegetables late into the season.

Containers also make it much easier to keep those pesky weeds in check and make access to the garden much easier. Double win!

3.    Compost!

 As a gardener, compost is your best friend – whether you chose to make your own or buy in store, it offers many benefits to your crop and the environment. Compost helps reduce your carbon footprint, help nourish the soil and ultimately, create tastier, healthier veggies.

Just collect your fresh food waste and garden waste, pop them into a composting bin, and within a few months, you’ll have a ton of ‘black gold’ you can use to grow your crop.

4.    Start with the easiest crops

 When you’re just getting started with urban gardening, it’s best to opt for vegetables and herbs which grow well in your local area. That way you won’t get overwhelmed with complicated growing techniques, but instead feel extra-motivated when you start munching on fresh produce you’ve grown in your very own urban garden.

Tomatoes, herbs, peppers, cabbage and lettuce are usually the best plants for beginners.

5.    Water them! But not too much…

 Remember that you’ll need to water your crop regularly for them to be healthy.

But don’t be tempted to overdo it. If you leave them drowning in water all day, they could fall victim to root rot and die before they produce anything. Instead soak the container with plenty of water, then allow the rest to drain through.

[If you have trouble remembering to water your urban garden, let technology help. Set a reminder on your phone and you’ll never forget again!]

6.    Grow vertically

 If you’re only got a teeny tiny yard or balcony where you can start your urban gardening project then consider vertical gardening.

Use netting and frames for vegetables like cucumbers, beans and tomatoes. Grow carrots or potatoes in deeper containers with holes in the sides. Or create clever shelf or stacking systems for lettuce and herbs so you can make the most of the space you have.

 Don’t let lack of gardening space deter you from starting your urban garden! You can still grow plenty of fresh produce if you’re clever about how you do it. The small effort is absolutely worth it.

So whether you have a balcony, city garden or small backyard, get growing!

bring your grass back to life

How to bring your lawn back to life in 5 easy steps

Bringing a lawn back to life after a long stint of cold, damp weather is a hugely rewarding but challenging process. As a general rule, when the first signs of spring begin to appear, it’s time to focus your attention on the lawn to get it primed for summer.

So, if your lawn is looking a bit patchy or brown, and sunshine alone won’t bring it back to full health, follow this guide to get it looking like a key feature to be proud of once again.

Bring your lawn back to life in 5 easy steps

1.Get rid of winter weeds and dry blades

Dead, dry blades, fungi and moss can all build up on our lawns during the winter and extended cold spells. Snow mould in particular only rears its head during extreme weather, so watch out for that in your garden. It’s time to get your wire rake out of the shed to get rid of this debris to make way for spring growth and reseeding if necessarily. Think of this raking, otherwise known as ‘scarifying’ the lawn, as exfoliating your lawn of the dead cells and dirt to celebrate the spring season.

2. Reseed to freshen up a sparse lawn

Shaping your lawn from seed is inexpensive and straightforward. Whether you are sowing seed to start from scratch or fill in patchy areas on an existing lawn, sowing is a much cheaper option for larger spaces – just don’t get expect instant results.

The right watering strategy is key: water your existing lawn well, sow your seeds and don’t water again until you begin to see the shoots coming through. Watering too early risks washing the seeds away and increases the chance of mould setting in.

How To Sow Grass Seed – A Complete Guide

3. The more your mow, the thicker your grass will grow

As soon as the cold winter snap seems to be over, and your grass seedlings are dry and established, start mowing at least once a fortnight in spring and once a week in summer to prompt full and thick regrowth. Remember to collect your clipping to store in a your compost bin. If you don’t have one, a thick black bin bag will do!

4. Feed your lawn regularly

Nothing brings existing foliage in the garden back to life like a good quality feed. Some feeds are designed specifically for the lawn, which are great if your lawn is moss and weed-free, and others have added ingredients to kill unwanted fungi, weeds and moss for quick results. Some are designed for the spring to promote new growth, and others are for toughening up your autumn grass in time for winter.

Not all feeds are pet-friendly, so check the packaging beforehand or ask the supplier. Chemical-free weed killing alternatives include boiling water – which may also affect your grass so it’s not ideal – vinegar, salt and sugar.

Whatever feed you choose, spread from April through to September for extended growth and health. Try a liquid feed from later spring into summer to feed as well as moisten your lawn during dry spells, then opt for a gentler feed which is low in nitrogen in autumn which won’t speed up growth and leave new shoots susceptible to winter frosts.

5. Aerate your lawn in late spring and early autumn

Your lawn can becoming compacted through use and different weather conditions, which restricts the absorption of air, water and nutrients at root level.

The concept and process of aeration is simple: take a strong, long-handled fork out of storage, put on a pair of boots or wellies with thick soles and use your weight to dig the fork down into the lawn to create small holes. Leave a set of holes every two feet or so until the entire lawn has been aerated.

Your work will stimulate new growth, improve water drainage and de-compact your lawn below surface level. Timing is key: aim to aerate in late spring and early autumn, when your lawn is established but when very hot weather hasn’t made the soil dry and hard to dig.

Why, How and When to Aerate a Lawn in the UK

Revive your lawn this spring with Bury Hill

Now’s the time to invest in a high-quality grass seed mix that has been blended for your specific use. Bury Hill supplies Limgrain grass seeds which have been treated with a transparent coating made from seaweed extract which ensures fast germination and strong root growth.

Find out about our package options and delivery prices by clicking through to our Grass Seed page.

child-friendly gardening checklist

Child-friendly gardening checklist for spring

It’s always exciting to see our gardens wake up once again after a long winter slumber. Spring is an active season for plants and gardeners in the UK. It’s a great time to inspire the next generation of gardeners to get outside and lend a hand to start growing their own flowers, fruit and veg.

Spring is a time for sowing seeds, watching wildlife and maintenance in the garden. A cool breeze may be lingering, but the garden still needs tending. We’ve put together the following guide, which lists child-friendly jobs, planting and activities by month to help your whole family enjoy your garden space.

March

Spring has sprung, busy days have begun!

Jobs to help with

Regular bug watches! Keep an eye out for slugs and snails

Cover bare borders with good quality topsoil

Rake up leaves and stick them in your compost bin

What to plant

It’s time to get summer bulbs in pots for summer colour

Sow herb seeds thinly in a tray or large pot

Sow lettuce seeds early indoors

Clear an area for wildflowers then spread a wildflower seed mix

Clear weeds to sow hardy annuals, like ‘Ladybird’ poppies

April

Prepare for April showers and sunshine

Things to do this month

Dig in a 5cm layer of good quality topsoil along borders

Help plant hanging baskets with bright blooms

Keep on top of weeds! Spread woodchip if needed

Continue your good work

Plant herb seedlings into separate pots or into the soil

Water your newly-planted fruit trees regularly

Add a soil conditioner before summer planting

Tie tomato plants to stakes for straight growth

Look out for frogs and frog spawn in the pond

May

A marvellous month for green fingers!

Now’s the time to

Find a good soil conditioner to break up heavy soil

Begin picking lettuce leaves for lunch!

Bundle herb sprigs into drawers for freshly-scented clothes

Spring sowing and planting

Sow sunflower seeds in a sunny spot outdoors

Pick a spot on a fence or wall for wallflower plants

Plant delicate indoor seedlings outdoors

Gather the first flowers of spring into a lovely bunch

3 ways to attract wildlife into the garden

Make a dark, warm hedgehog hotel using a wooden crate filled with leaves left turned upside down, with a small air hole and an entrance.

Place a small strip of carpet, or any other thick fabric, along a border to attract slow-worms. Often mistaken for baby snakes, these lizards are becoming an increasingly rare sight in the UK.

Create a makeshift bird feeder by stuffing melted fat or lard (an adult must be present) peppered with nuts and seeds. Finally, attach some rope to the container and hang it from a tree that is in plain sight from your house.

Make your garden look and feel great in time for spring with a nutritious topsoil and soil conditioner. All our premium grade topsoils and loams are blended using high-quality natural soils, selected sands and grits and organic compost from known sources, using local materials where possible. If you would like to place an order, visit our topsoil delivery information page.


Gardening tools on garden soil texture background top view

A Gardener’s Guide to Organic Soil Conditioner

As avid gardeners ourselves, we understand the satisfaction of discovering easy techniques and multi-purpose materials which help to keep our gardens healthy.

Here at Bury Hill, we select the best materials and complementary products that we would buy ourselves. One such material, one which you may not have used until now, is our organic soil conditioner: a great peat substitute and nutritional all-rounder that’s ideal for improving all types of soil.

If you have sandy soil which requires a lot of organic matter to improve its health, or temperamental cloggy wet clay soil which is a challenge all year round, soil conditioner is the perfect ingredient for your problematic beds and borders.

How organic soil conditioner is made

Good quality soil conditioner takes time to make, often with a 5-10 year process to utilise the nutrients stored in organic matter. Organic soil conditioner, as the name suggests, is free from artificial substances. It’s produced using 5-year-old composted waste matter, which is then screened to 10mm, making it easy to rake and spread. It’s this natural process which gives the conditioner its dark rich colour and near neutral pH level.

What are the key benefits?

When we talk about using soil conditioner in the garden, we’re simply referring to using organic matter.

Whereas manure provides some nutrients when combined with existing topsoil, however, soil conditioner is most effective when used to help ‘hungry’ plants.

Using your soil conditioner as mulch for your beds and borders – around trees, shrubs, flower borders and vegetable plot – will feed your plants, protect roots from cold snaps, lock in moisture and quash rapid weed growth.

How to use organic soil conditioner

For best results, spread a thick layer approximately 3-4 centimetres deep across the soil, using a fork or spade to incorporate the conditioner into your existing topsoil. This will instantly improve soil structure and fertility.

Due to its excellent nutrient content and water retention properties, soil conditioner promotes root growth while remaining a safe, sterile and stable organic matter to mix into your soil.

Tip: Ensure soil is moist rather than frozen when applying conditioner to a suitable area outside, preferably cleared of weeds beforehand.

Storing soil conditioner for longer-lasting performance

To maintain freshness and performance, store your organic soil conditioner in a dry, frost-free place undercover, away from pesticides and other garden chemicals. Always reseal the bag after use and avoid breathing in dust whilst spreading and storing your soil conditioner.

If you wish to place an organic soil conditioner order, please use our postcode finder to determine delivery and pricing.

Money-Saving Gardening Tips

10 Money-Saving Gardening Tips Part two

Last year, we took you through our top 10 money-saving gardening tips for our thrifty customers, from money management to researching your landscape supplier properly. However, a gardeners work is never done, and every season presents fresh opportunities to plan ahead! So, if you’re a beginner looking to cut costs or you need a tips top up, you’ve come to the right blog.

1. First, preserve leftover seeds

Seed packets may be small on size but many are big on price – the rarer or more popular the flower, for example, the more expensive they are to grow from seed. One of the easiest ways to cut down on seed expenditure every year is to store all your packets and leftover seeds (because you will always have some left over). Airtight plastic containers and glass jars are best, in a cool dry area away from direct sunlight.

2. Or, collect seeds to use again next year

Collecting flower and vegetable seeds at the end of their growing season will keep your seed collection topped up every year without having to head to the gardening centre. It’s not difficult to do, and some plant seeds are easier than others to harvest. Here’s a quick list of seed-saving vegetables to consider:

  • Peppers

  • Melons

  • Squash

  • Aubergines

  • Cucumber

  • Tomato

The smaller the seed, the bigger the hassle. But trust us, storing home-grown seeds is very satisfying – and frugal!

3. Learn how to take and grow cuttings

You don’t have to wait until a flower or fruit has lost its luster until you can start creating money-saving tips. As soon as plants begin to grow additional stems and shoots, there’s potential to take cuttings to grow on, sell or barter with friends. Here’s a quick tree cuttings guide, for example, to note:

  • Softwood cuttings: late spring, early summer

  • Semi-hardwood: midsummer after flowering

  • Hardwood: end of summer

4. Buy mulch in bulk

If you’ve decided that you’re a minimalist gardener – more interested in materials and practicality- consider using attractive materials in bulk like woodchip and bark to spread around the garden. Bulk buying is often a cheaper, easier and quicker solution for this type of garden project.

5. Shop comparitably

There are plenty of online comparison sites to choose from, selling everything from garden furniture and features to tools and lawnmowers. So shop around to find the cheapest prices on the market, alongside seasonal deals and sales.

6. Avoid overplanting

It’s easy to burden a big flower or vegetable bed with too many plants all at once to achieve a mature, lively scene straight away. As a rule, start with the bigger plants at the back and work your way forward in size until you reach the front, leaving enough room around each plant so they’re not constantly competing for light and nutrients.

7. Test your soil

If you go on a spending spree before testing your soil – what nutrients your soil lacks and its pH – your plants may not be suited to the conditions and will eventually wither, no matter how much you feed them. Test your soil and plan a planting scheme accordingly, like you would with shady and sunny spots in the garden. Consider using specialist soils to give your beds a boost.

8. Try natural, DIY feeds

We’re big fans of trying natural products in the garden when you can. Our pH-neutral organic soil conditioner, for example, is used by customers who want to improve their soil without potentially damaging chemicals.

Natural options to include in the garden include:

  • Making your own weed killer

  • Making your own compost

  • Save your grass clippings to use on your lawn as a DIY feed

9. Get free advice or speak with an expert

If you’re looking for extra ways to be creative in the garden, there’s a wealth of free knowledge online, at your local library or in free magazine supplements to get you started. Alternatively, as we pointed out in our earlier post, investing an hour or so with a landscaping expert to discuss your project to avoid mistakes is often good value for money over the long-term

10. Finally, use water wisely

Rather than add to your water bill during the summer when tending to your garden, collect water from other sources where you can. Installing a water butt, or leaving open containers around the garden to collect rainwater, is quick and easy. Additionally, watering directly on the soil rather than higher up on the leaves ensures water goes to where it is needed and adding two to three inches of mulch to your soil locks in moisture for longer.

For more even more evergreen tips on how to keep your garden looking great for less, revisit our first money-saving blog.

If you’re interested in any Bury Hill product or service listed in this blog, please call our team on 01306 877 540 for more information, or use our postcode delivery finder to receive an estimated price for your order.