Tag Archives: garden supplies

Smart ways to get your garden shed organised

Garden shed exterior with open door, tools, and plants.

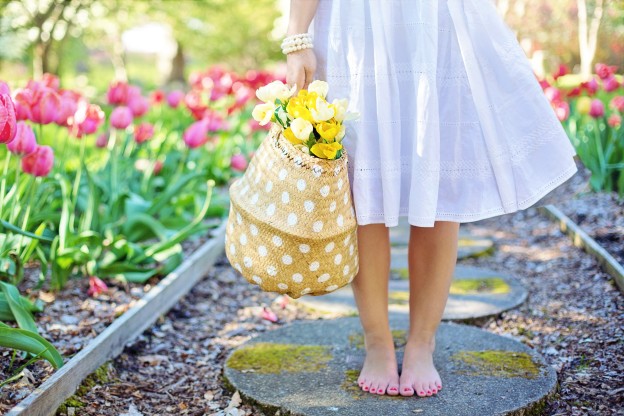
With the weather getting warmer and spring plants beginning to emerge in all their glorious colours, there has never been a better time to get your garden organised. Prepare your garden now, so that when the sun comes out for real, all you’ve got to do is grab a great book, pull up a chair and enjoy!

Getting your garden organised not only means tidying up your plants, wiping down furniture and potting new blooms, it’s also about tackling the dreaded garden shed, and making it a practical and useful space that will make keeping on top of your gardening tasks so much easier.

We’ve all been guilty of letting our garden sheds become a dumping ground for anything that doesn’t ‘belong’ indoors. Quickly what was once the perfect place to access all your garden-related tools becomes stuffed to the rafters with things you don’t use or need, making it impossible to locate anything with ease.

So what can you do to put an end to the clutter, and get your garden shed in tip-top shape for summer? Try the following:

Put up some racks and shelves

Getting your garden shed sorted is all about making the most of your space. By putting up racks on the walls you can immediately hang gardening tools such as rakes and spades for easy access, and shelving can make room for pots, seeds, and tools that you can get to without doing yourself an injury!

Consider what you need to access most frequently

Before you decide where everything should go, it’s sensible to think about those items that you need to access all the time, compared with those that you use far less frequently. Make life easier for yourself by putting those much-used items nearer the front of the shed or in places you can grab them without having to wade through or stretch over other things to get to them.

Invest in some clever storage

Storage is crucial and thinking about the kind of storage you need to make the best use of your shed will help to ensure it stays ordered. Have a place for everything and sort items into different drawers, boxes or storage units to ensure that everything is kept separately and therefore reduce the risk of getting it all muddled and cluttered again.

Get labelling!

Once you have separated items into different storage compartments, you should label them clearly so that it’s easy to know where everything is. Perhaps more importantly, you’ll know where to put items back once you’ve used them too!

Use the entire height of the shed

Remember, it’s not only the walls you can hang things from but the ceiling too. Why not free up some space by investing in some vertical bike storage? You can keep your bikes dry, get to them quickly, but keep them from taking up too much room at the same time – it’s a no brainer!

By following the above tips, you can make sure that your garden shed is a neat, tidy and useful space that will mean you can access all your gardening tools and equipment without any hassle.

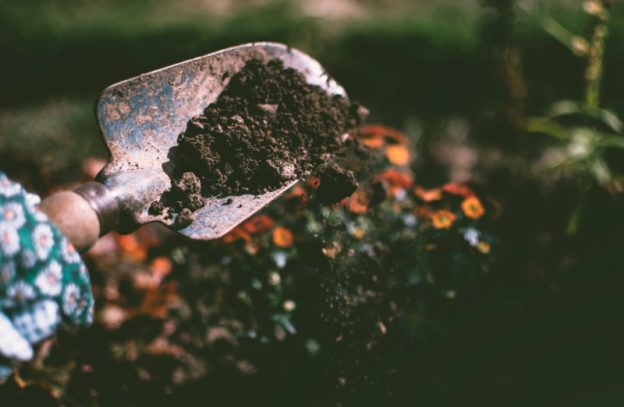
At Bury Hill, we offer a range of gardening and landscape supplies to make your garden looks great, from top-quality soil to lawn turf, woodchip and decorative stone we’ve got all the supplies you need to reshape your garden our outside area into an attractive and relaxing space, however big or small!

How To Use Railway Sleepers In Your Garden

Garden stairs made from railway sleepers

If you are looking to revamp your garden in time for spring, one of the easiest and most transformative ways to do so is by thinking about how you can neaten up your current space, create new areas for seating and planting and get it looking great in time for the warmer weather.

Railway sleepers are a fantastic and cost-effective way to create a brand new look for your outside area and work well in gardens of any shape or size.

What are railway sleepers?

Railway sleepers are used to help support the bottom rails in train tracks making sure they remain correctly spaced as well as providing support so that they stay upright. When railroad tracks were first laid railway sleepers were all made from wood, though now concrete is often used instead.

Of course, you aren’t planning to lay a railway track in your garden, so what are they used for here? Because of their shape and structure, railway sleepers are perfect to use in the garden to help landscape the space. Wooden railway sleepers can give your garden a sleek, designer look, without extensive effort or expense.

How can you use wooden railway sleepers in the garden?

Railway sleepers have many great uses. Here are some ideas of how you could use them to create features and separate areas in your outdoor space.

Raised flower beds

Using sleepers to create raised flower beds can give it a different dimension and add interesting shapes and beautiful colours too. For a more unique look, mix more weathered sleepers with newer ones to create contrast and exciting lines.

Retaining walls

If you have an area you want to separate, you could use railway sleepers to create a retaining wall to fence it off while also adding texture. So if you have a pool area or a dining or BBQ area, you can terrace your garden with railway sleepers and create different spaces for socialising and entertaining.

Garden pathways

If you want to create smart edges around your garden path, railway sleepers are the ideal material to give a more defined look. If you don’t have a garden path yet, you could create the outline using railway sleepers and fill in with gravel or bark. Larger sleepers could also be used to create the path itself using them as “stepping stones” to lead to a different area of your garden.

Feature steps, furniture, and seating areas

Wooden railway sleepers can also use used to create steps up to (or down from) raised areas of your garden. Similarly, railway sleepers can be used to create different seating areas in your garden too. Railways sleepers can be a great material to build simple wooden garden furniture such as tables and benches. You can even use railway sleepers to create eye-catching design elements such as a water feature complete with lush plants and pond ornaments, or even fish!

Decking & patios

Railway sleepers can also be used as an alternative to traditional decking boards. Sleepers offer a more rustic and arresting effect which can complement the plants and flowers growing in your garden.

Buying railway sleepers

There are lots of different options to choose from, and you may have to do your research to decide which type will look best in your garden, depending on your project and what kind of look you are going for. Aged wood can look more natural and blend seamlessly into your current garden design, or you could choose original reclaimed sleepers which will be treated to give them a longer lifespan. Newer varieties come in hardwood and softwood and a variety of different shapes and sizes. Hardwood sleepers tend to be better for building patios and retaining walls as they can withstand higher forces and footfall. Softwood sleepers are easier to manipulate.

Making the most of your railway sleepers

Should you decide to use railway sleepers in your garden, it’s a good idea to choose wisely as if the wood is in regular contact with moisture it may not last as long. Similarly, if you have to cut the wood to create certain features, the untreated core may then be more susceptible to damage. Treating timber can help to preserve the wood and extend its longevity.

Using railway sleepers in your garden is a great way to refresh the space, and there are lots of different ways this material can be utilised to significant effect. So if you are hoping to make your garden look fabulous in time for spring why not get planning and use railway sleepers to enhance your outside space?

At Bury Hill, we provide not only quality railway sleepers but also a range of soils, seeds and decorative stones to help gardeners create beautiful green spaces. If you have any questions or need any advice about your gardening project, give our friendly team a call on 01306877540 today!

Winter Gardening Tips – What To Plant & What To Protect

winter garden

Winter can be a sad time for gardeners. The weather turns colder, the frosts make the ground unworkable, and all the beautiful blooms of spring and summer are but a distant memory.

Many people tend not to venture into the garden much during winter, and just let nature take its course until the milder climate returns. However, neglecting your garden during the colder months can mean you make life harder for yourself, and you could find that without a bit of love and care some of your more delicate plants take a beating, making it tougher for them to return to their former glory later in the year.

It’s also worth noting that a garden can be enjoyed all year round. Even if it’s just to admire it from the cosiness of your kitchen or living room. Many plants come into their own in colder weather, and you can still enjoy a vibrant, thriving outdoor space when winter comes a-knocking.

So let’s take a look at what gardeners can do to keep their gardens looking great this winter.

What to plant in your garden this winter

Plant out winter bedding. Winter bedding plants are an ideal solution to sad, bare borders. Choose hardy shrubs and plants with lots of foliage to bulk out these areas, bringing some greenery and life back into the garden.

Grow fresh food. There is nothing more satisfying than growing your own food, and greens such as lettuce, arugula and mustard, kale and Swiss chard can all do well in colder temperatures. There are plenty of root crops and brassicas that will develop over winter in time for a spring harvest too.

Invest in some colourful winter-blooming plants. If your garden is looking a little bleak then lift your spirits by injecting some colour. Plants such as winter hazel, witch hazel, and honeysuckle are elegant and attractive, and bulbs such as snowdrops, species crocus, and winter aconite can also bring a smile to one’s face as they pop up through the snow and let you know that spring is on the way.

What to protect in your garden this winter

Before the severe frosts arrive, make sure you protect your garden by thoroughly watering the soil. Once they come, you can keep shrubs and plants safe by mulching bases with shredded leaves,  bark or woodchip for added insulation.

Any newly planted trees or shrubs should be wrapped with a layer of burlap stuffed with an insulating material like dried leaves or straw to keep them safe from the frost.

Get your garden tidy and clear up fallen leaves, berries, and other debris from lawns, decking, and ponds before they decompose and cause damage.

Winter doesn’t just mean colder weather, but wetter weather too so raise plants in pots onto pot feet to stop them waterlogging. Outdoor containers will also benefit from insulation; bubblewrap can be used to protect plants from the cold.

Roses are prone to wind-rock which can uproot them and damage them irreversibly. By pruning them back, gardeners give roses the best chance of standing up to the high winds that winter brings.

Fruit trees are prone to winter moth damage, and by using grease bands around the trunks, gardeners can protect them from these pests.

Remember, it’s easy to focus on protecting your plants, but winter is a harsh season for all wildlife and putting out bird food can help hungry birds survive these months, and bring cheering life into the garden too.

If the unpleasant weather is too off-putting then why not bring a little of the outdoors inside? Growing bulbs such as paperwhite narcissus or amaryllis indoors can help keep gardeners fingers green without having to the brave the cold!

Keeping your soil in excellent condition is a year-round job. Make sure you don’t neglect your soil this winter and keep it healthy with our Soil Conditioner, Composts & Mulches.

By following our winter gardening tips, you can enjoy your garden throughout the seasons and make sure it’s healthy and protected over the winter months to get back to its beautiful, blooming best come spring.


railwaysleepers

Using Railway Sleepers in Your Garden: Project Ideas for Homeowners

Railway sleepers are those rectangular pieces of wood that you’ll see supporting railway tracks. They help the rails stay evenly spaced, upright, and in the correct shape.

But did you know that they’re also fabulous for creating stunning garden features?

Use them in your garden project and you’ll transform the look and feel of your garden, and perhaps even make the neighbours green with envy.

Here are some tips on how you can include railway sleepers in your garden, including project ideas, how to lay railway sleepers and where you can buy them.

Railway sleeper project ideas

Railway sleepers make a versatile, attractive and hard-wearing addition to any garden, adding natural texture and an eco-conscious feel to your outside space.

Here are our favourite ways you can use them.

1. Create a path

Make a great easy pathway on grass or gravel to add a touch of rustic chic to your outdoor space.

2. Build some garden steps

If you’re not a fan of bricks or stone, why not use those sleepers to make some steps instead? You can create the exact garden look that you want, they age really well, and they’re very straightforward to make.

3. Edge your veg

You could also use your railway sleepers to create an attractive boundary between your vegetables, flowers and the rest of your garden.

4. Build a raised bed

If you have poor soil quality, minimal space or you’d just like to keep your plants contained, use those sleepers to create a raised bed.

5. Craft a bench

Railway sleepers can also be used to create a stylish and rustic-looking bench which will fit perfectly in your garden design scheme.

6. Border your lawn

To create an effortless boundary for your lawn, lay some railway sleepers and then sit back to enjoy your handiwork!

Laying railway sleepers

Once you’ve decided which project you want to tackle, you can get stuck in! Here’s how:

Gather your tools

You only need a bare minimum of tools when you use railway sleepers in your garden. Usually, this involves a saw, a hammer, a screwdriver, wood screws, nails, a spirit level and safety equipment like gloves and goggles.

Clear the area

Before you start laying the railway sleepers, you also need to ensure the area is clear from unwanted vegetation and materials like rocks, roots and rubble.

Create your foundations

Next, you’ll need to prepare the area and then dig a shallow, level trench (unless you’re creating a piece of garden furniture), then add a bedding mixture to hold those sleepers in place. This will create solid foundations for your project.

Get building!

Once you’ve done this, you can start building your creation, using a combination of wood screws, nails or galvanised straps.  Make sure you use your spirit level to keep everything looking professional.

Finish off

Then it’s time to trim away any excess material, gently round the edges of the wood and treat using a wood preservative if required. If you’re creating a planter, this is when you’d add your high-quality topsoil before standing back and appreciating the fruits of your labour!

Voila! You’re done.

Where can you buy railway sleepers?

The good news is that it’s easy to find railway sleepers for sale these days. You can find them in most garden centres and also online.

If you’re looking for railway sleepers in Sussex, Surrey and London, look no further than our dedicated page.

Railway sleepers add a unique touch to any garden space, so why not dive into one of these projects and transform your outside space?

premium grade topsoil

What Causes Poor Soil Quality and How Can You Fix It?

Poor soil quality is every gardener’s worst nightmare.

There’s nothing worse than carefully planning and creating your perfect garden, only to produce vegetables, fruit or flowers that are weak, unhealthy and altogether disappointing.

Without healthy soil, all your gardening efforts could be in vain because healthy soil is essential for strong, nutritious, high-yielding plants that can resist pests and diseases and look beautiful in your garden.

If this sounds like your garden, don’t despair. Poor soil quality is a relatively common gardening problem. With some topsoil TLC, it can soon be improved.

So today let’s discuss how to spot if you have poor quality soil, why this happens, and how buying high-quality topsoil can help.

How do you know if your soil is poor quality?

Poor quality soil is usually very easy to spot because of its appearance, water drainage, the quality of your crops, and the presence or absence of weeds and other wildlife in your garden.

Soil texture

Soil that is hard to work, overly cloddy, loose, fine and sandy, ‘floury’, or filled with stones and pebbles are of poor quality. You’ll notice that any water tends to absorb water poorly and drain poorly. drain poorly and potentially flood.

Crop quality

If your tomato crop constantly suffers from blight or diseases, your cucumbers don’t grow as large as they should, or you suffer from other problems with crops or flowers, you are probably suffering from poor soil quality.

Local wildlife

Another surprising way you can tell if your soil is poor quality is by looking at the wildlife that visits. If there’s less healthy wildlife such as worms and bees around, and/or an excess of weeds, it’s time to improve that soil quality!

What causes poor soil quality?

Poor soil quality is often caused by one of these five factors:

  • Over-farming. Growing too many crops in one space year after year removes essential nutrients like nitrogen, potassium and phosphorus from the soil.

  • Infrequent crop rotation. Without adequate crop rotation, the demand for the same nutrients is high, leading to a long-term shortage and poor quality soil.

  • Draught or water shortages. Dry soil causes essential nutrients to gather in ‘clusters’ in the soil, making it much harder for those plant roots to reach.

  • Flooding or heavy rain. Soil that is overly wet will leach nutrients and essential topsoil can wash away.

  • Soil contamination. Overuse of toxins or chemical can contaminate the soil and reduce soil fertility.

  • New homes. A large portion of the healthy topsoil gets stripped away during home building, leaving behind poor quality soil that is less fertile.

How to fix poor quality soil

Thankfully, improving your soil quality and growing better plants is easy.

Pop to your local garden centre and select a high-quality topsoil that is high in nutrients and organic matter. (We provide topsoil and landscape supplies in Sussex, Surrey and London that would be perfect for the job!)

These topsoils are great for all garden purposes including improving your existing soil quality, and creating new beds, borders, raised beds or even lawns.

Topsoil prices vary, depending on what grade soil you choose:

  • Premium grade topsoil: Highly fertile, great structure and should be free from weed seeds.

  • General purpose: Great for creating new beds, borders and for laying new lawns. Comes in different screen size grades.

  • Economy: More affordable. Usually comes unscreened. Ideal for increasing the quantity of soil in your garden.

If you are struggling with poor quality soil, remember that there is hope. Simply invest in some high-quality specialist soils and you will soon produce a beautiful, healthy garden to be proud of.

Gardening Gift Ideas Christmas Guide

Gardening Gift Ideas Christmas Guide | Bury Hill blog

As a nation of garden lovers, it’s no surprise that searches for gardening gift ideas are already surging in the run-up to Christmas. With so much on offer, gardening enthusiasts are spoilt for choice in the shops throughout the year, but what should their loved ones look for to provide a special Christmas gift that they’ll love? We’ve split up the gardening gifts market into popular searches right now to see what’s on offer.

Gardening in an apartment for city living

Decorative shelves – perfect for mounting on a wall for much-loved pot plants for green living in a city

Hanging pots – an alternative way to present prized blooms, either as a space-saving indoor feature or strung up outside a balcony

Herb seeds – hardy and handy, herbs make an essential accessory on top of the smallest window sill.

Gardening gadgets for the modern gardener

Macro phone lens: for those who love to proudly show off their hard work in the garden online. A magnifying clippable lens for Android of iPhone enables users to take eye-popping macro photos, anytime and anywhere

Solar lights – affordable tea lights transform a dark, dingy space into a colourful space for entertaining throughout the year

Weatherproof outdoor speakers – splash out a little more on a musical gadget for a loved one to enjoy in the garden, come rain or shine

Unusual gardening gifts

Vintage planter – trendy and full of character, vintage, worn planters are on-trend and in-demand. Look online for the best deals

Unique garden ornament – you needn’t pick up a garden gift for your nearest centre. Hundreds of independent sellers offer unique products for the garden, from furniture and statues to planters and children’s products, that you can’t find anywhere else

Jewellery – say ‘Happy Christmas’ with a piece of botanical jewellery, that’s both delicate and personal

Garden tools to cover the essentials

A shorted handed trowel – perfect for planting, weeding and maintenance in a smaller space

A high-quality set of gardening gloves – store them away from direct sunlight and moisture for durability

Watering can – OK, this won’t fit in a stocking, but a quirky, colourful watering can is sure to go down a treat

Transform any outdoor space with Bury Hill garden products

Whether you’re shopping or having a sneaky browse for your own garden, you can count on Bury Hill to provide the high-quality products to transform any garden space. From attractive decorative stone for water features and pathways to nourishing premium topsoils and loams, discuss your requirements with our team on 01306 877540 to determine delivery and pricing

aquatic-plants-biotope-flowers-46231

A Beginner’s Guide to Autumn and Winter Pond Care

The autumn and winter are the toughest months of the year for our garden ponds. This means it’s vitally important to tackle those essential pond care jobs before the coldest weather comes.

Get it right and you’ll ensure your fish are healthy, pond plants thrive and that it all looks beautiful when the warmer weather comes around again.

6-step autumn and winter pond care action plan

Here’s our foolproof autumn and winter pond care guide that will help you take care of these remaining garden pond care jobs quickly and easily.

1. Remove fallen leaves

We all love to crunch our way through those autumn leaves, but they’re one of the main causes of pond problems during the autumn and winter. Once they fall into your pond, they start to decay and can disrupt the fragile ecosystem of your pond, killing your fish and harming any wildlife living there.

So make it your priority to skim away those leaves once they start to fall before they can do any harm. Don’t forget to remove them from any decorative stones, pond pumps and pond ornaments, too!

If your pond lies within close range of a tree, or leaves are a real problem, it’s also worth considering covering your pond with protective netting (also useful when it comes to deterring predators – see below – or investing in a pond filter.

2. Keep your pond free from ice

When the big freeze comes, it’s vital to make sure that your pond isn’t completely covered with ice. Gases from any rotting plants or organisms can soon build up, precious oxygen levels can drop and it could potentially damage your pond liner.

Prevent this from happening by placing a floating pond de-icer, a clean ball or a clean plastic bottle containing a few stones into the pond water.

If you leave it too late, don’t panic. Simply pour a small amount of warm water onto a small patch of ice, allow it to melt, and keep the hole open using the tips above. Whatever you do, definitely don’t shatter the ice as this can traumatise and even kill your fish.

3. Give your pond plants some love

Another great way to avoid rotting leaves, dying plants and other cold season havoc is to look after those pond plants before the weather gets too cold.

Start by removing any dead or dying leaves from your pond plants and tossing them on your compost heap. Also, make sure that their roots are planted deep enough so they have a better chance of surviving the winter.

Then, completely remove any plants that don’t like being submerged in the icy water, such as Japanese Iris or Cardinal Flower. Pop them into your garden until the spring rolls around again, top up with some nourishing premium grade topsoil, and you’ll have healthy, strong plants for next year.

4. Cut down on fish food

Even though fish don’t hibernate like many other animals, they do descend to the deeper, warmer waters in your pond and their metabolisms slow significantly once the outside temperatures drop. This means that you’ll need to feed them much less than you usually do.

Stick to just one or two small helpings per week during the autumn. Once temperatures drop below 10°C, you should stop feeding them altogether.

Most importantly, be sure that there’s no food left floating around as this could pollute your pond water, damaging the pond ecosystem.

5. Beware of predators

The autumn and winter are dangerous months for any fish living in your garden pond as there’s less food around and so more hungry predators looking for a snack. Make sure they don’t take a fancy to your Koi Carp or goldfish by covering your pond with high-quality netting or adding a scarecrow to your garden.

6. Consider switching off your pond pump

If temperatures drop below freezing, it’s a wise idea to turn off your pond pump.

Cold water contains plenty of oxygen already, and the metabolism of your fish will slow down anyway. Plus, you’ll save money on electricity costs and give yourself have a great opportunity to clean the pond pump ready for next year.

So, before it gets too chilly outside, make sure you’re preparing your garden pond for the colder weather. It needn’t take long and that little bit of effort will be well worth it! It’s also worth noting that wooden pond features need extra protection during the colder months, which is why we recommend considering attractive decorative stones as a fuss-free alternative for your water feature.

bring your grass back to life

How to bring your lawn back to life in 5 easy steps

Bringing a lawn back to life after a long stint of cold, damp weather is a hugely rewarding but challenging process. As a general rule, when the first signs of spring begin to appear, it’s time to focus your attention on the lawn to get it primed for summer.

So, if your lawn is looking a bit patchy or brown, and sunshine alone won’t bring it back to full health, follow this guide to get it looking like a key feature to be proud of once again.

Bring your lawn back to life in 5 easy steps

1.Get rid of winter weeds and dry blades

Dead, dry blades, fungi and moss can all build up on our lawns during the winter and extended cold spells. Snow mould in particular only rears its head during extreme weather, so watch out for that in your garden. It’s time to get your wire rake out of the shed to get rid of this debris to make way for spring growth and reseeding if necessarily. Think of this raking, otherwise known as ‘scarifying’ the lawn, as exfoliating your lawn of the dead cells and dirt to celebrate the spring season.

2. Reseed to freshen up a sparse lawn

Shaping your lawn from seed is inexpensive and straightforward. Whether you are sowing seed to start from scratch or fill in patchy areas on an existing lawn, sowing is a much cheaper option for larger spaces – just don’t get expect instant results.

The right watering strategy is key: water your existing lawn well, sow your seeds and don’t water again until you begin to see the shoots coming through. Watering too early risks washing the seeds away and increases the chance of mould setting in.

How To Sow Grass Seed – A Complete Guide

3. The more your mow, the thicker your grass will grow

As soon as the cold winter snap seems to be over, and your grass seedlings are dry and established, start mowing at least once a fortnight in spring and once a week in summer to prompt full and thick regrowth. Remember to collect your clipping to store in a your compost bin. If you don’t have one, a thick black bin bag will do!

4. Feed your lawn regularly

Nothing brings existing foliage in the garden back to life like a good quality feed. Some feeds are designed specifically for the lawn, which are great if your lawn is moss and weed-free, and others have added ingredients to kill unwanted fungi, weeds and moss for quick results. Some are designed for the spring to promote new growth, and others are for toughening up your autumn grass in time for winter.

Not all feeds are pet-friendly, so check the packaging beforehand or ask the supplier. Chemical-free weed killing alternatives include boiling water – which may also affect your grass so it’s not ideal – vinegar, salt and sugar.

Whatever feed you choose, spread from April through to September for extended growth and health. Try a liquid feed from later spring into summer to feed as well as moisten your lawn during dry spells, then opt for a gentler feed which is low in nitrogen in autumn which won’t speed up growth and leave new shoots susceptible to winter frosts.

5. Aerate your lawn in late spring and early autumn

Your lawn can becoming compacted through use and different weather conditions, which restricts the absorption of air, water and nutrients at root level.

The concept and process of aeration is simple: take a strong, long-handled fork out of storage, put on a pair of boots or wellies with thick soles and use your weight to dig the fork down into the lawn to create small holes. Leave a set of holes every two feet or so until the entire lawn has been aerated.

Your work will stimulate new growth, improve water drainage and de-compact your lawn below surface level. Timing is key: aim to aerate in late spring and early autumn, when your lawn is established but when very hot weather hasn’t made the soil dry and hard to dig.

Why, How and When to Aerate a Lawn in the UK

Revive your lawn this spring with Bury Hill

Now’s the time to invest in a high-quality grass seed mix that has been blended for your specific use. Bury Hill supplies Limgrain grass seeds which have been treated with a transparent coating made from seaweed extract which ensures fast germination and strong root growth.

Find out about our package options and delivery prices by clicking through to our Grass Seed page.

child-friendly gardening checklist

Child-friendly gardening checklist for spring

It’s always exciting to see our gardens wake up once again after a long winter slumber. Spring is an active season for plants and gardeners in the UK. It’s a great time to inspire the next generation of gardeners to get outside and lend a hand to start growing their own flowers, fruit and veg.

Spring is a time for sowing seeds, watching wildlife and maintenance in the garden. A cool breeze may be lingering, but the garden still needs tending. We’ve put together the following guide, which lists child-friendly jobs, planting and activities by month to help your whole family enjoy your garden space.

March

Spring has sprung, busy days have begun!

Jobs to help with

Regular bug watches! Keep an eye out for slugs and snails

Cover bare borders with good quality topsoil

Rake up leaves and stick them in your compost bin

What to plant

It’s time to get summer bulbs in pots for summer colour

Sow herb seeds thinly in a tray or large pot

Sow lettuce seeds early indoors

Clear an area for wildflowers then spread a wildflower seed mix

Clear weeds to sow hardy annuals, like ‘Ladybird’ poppies

April

Prepare for April showers and sunshine

Things to do this month

Dig in a 5cm layer of good quality topsoil along borders

Help plant hanging baskets with bright blooms

Keep on top of weeds! Spread woodchip if needed

Continue your good work

Plant herb seedlings into separate pots or into the soil

Water your newly-planted fruit trees regularly

Add a soil conditioner before summer planting

Tie tomato plants to stakes for straight growth

Look out for frogs and frog spawn in the pond

May

A marvellous month for green fingers!

Now’s the time to

Find a good soil conditioner to break up heavy soil

Begin picking lettuce leaves for lunch!

Bundle herb sprigs into drawers for freshly-scented clothes

Spring sowing and planting

Sow sunflower seeds in a sunny spot outdoors

Pick a spot on a fence or wall for wallflower plants

Plant delicate indoor seedlings outdoors

Gather the first flowers of spring into a lovely bunch

3 ways to attract wildlife into the garden

Make a dark, warm hedgehog hotel using a wooden crate filled with leaves left turned upside down, with a small air hole and an entrance.

Place a small strip of carpet, or any other thick fabric, along a border to attract slow-worms. Often mistaken for baby snakes, these lizards are becoming an increasingly rare sight in the UK.

Create a makeshift bird feeder by stuffing melted fat or lard (an adult must be present) peppered with nuts and seeds. Finally, attach some rope to the container and hang it from a tree that is in plain sight from your house.

Make your garden look and feel great in time for spring with a nutritious topsoil and soil conditioner. All our premium grade topsoils and loams are blended using high-quality natural soils, selected sands and grits and organic compost from known sources, using local materials where possible. If you would like to place an order, visit our topsoil delivery information page.


Gardening tools on garden soil texture background top view

A Gardener’s Guide to Organic Soil Conditioner

As avid gardeners ourselves, we understand the satisfaction of discovering easy techniques and multi-purpose materials which help to keep our gardens healthy.

Here at Bury Hill, we select the best materials and complementary products that we would buy ourselves. One such material, one which you may not have used until now, is our organic soil conditioner: a great peat substitute and nutritional all-rounder that’s ideal for improving all types of soil.

If you have sandy soil which requires a lot of organic matter to improve its health, or temperamental cloggy wet clay soil which is a challenge all year round, soil conditioner is the perfect ingredient for your problematic beds and borders.

How organic soil conditioner is made

Good quality soil conditioner takes time to make, often with a 5-10 year process to utilise the nutrients stored in organic matter. Organic soil conditioner, as the name suggests, is free from artificial substances. It’s produced using 5-year-old composted waste matter, which is then screened to 10mm, making it easy to rake and spread. It’s this natural process which gives the conditioner its dark rich colour and near neutral pH level.

What are the key benefits?

When we talk about using soil conditioner in the garden, we’re simply referring to using organic matter.

Whereas manure provides some nutrients when combined with existing topsoil, however, soil conditioner is most effective when used to help ‘hungry’ plants.

Using your soil conditioner as mulch for your beds and borders – around trees, shrubs, flower borders and vegetable plot – will feed your plants, protect roots from cold snaps, lock in moisture and quash rapid weed growth.

How to use organic soil conditioner

For best results, spread a thick layer approximately 3-4 centimetres deep across the soil, using a fork or spade to incorporate the conditioner into your existing topsoil. This will instantly improve soil structure and fertility.

Due to its excellent nutrient content and water retention properties, soil conditioner promotes root growth while remaining a safe, sterile and stable organic matter to mix into your soil.

Tip: Ensure soil is moist rather than frozen when applying conditioner to a suitable area outside, preferably cleared of weeds beforehand.

Storing soil conditioner for longer-lasting performance

To maintain freshness and performance, store your organic soil conditioner in a dry, frost-free place undercover, away from pesticides and other garden chemicals. Always reseal the bag after use and avoid breathing in dust whilst spreading and storing your soil conditioner.

If you wish to place an organic soil conditioner order, please use our postcode finder to determine delivery and pricing.