Category Archives: Gardening Advice

5 Things to consider when choosing your landscaping materials for your landscaping project

Redesigning your garden is a big project, and one that requires a great deal of planning and thought. When you make the decision to put time and money into creating the perfect oasis right outside your door, you want to make sure you get it right. Choosing the right landscaping materials for your project is one of the biggest decisions you will make when it comes to redesigning your garden, and one you don’t want to get wrong. There are several factors to consider when choosing your materials, and with so many landscaping suppliers and landscaping companies out there offering different advice and materials it can often be overwhelming.

landscaping materials - Bury Hill

Preparing questions that you should ask landscaping companies is a great way to ensure that you get all the information you need before choosing the materials for your landscaping project, and any reputable landscaping company will be happy to give you lots of information and advice to help you choose. Here at Bury Hill we have listed five things below for you to consider when choosing the materials for your landscaping project.

1. Make a plan

The most important piece of preparation is to create a plan of exactly how you want your garden to look when it is done. Map out a visual drawing of the area you are working on and where the sun hits each part at what time of day. That way you can ensure when it comes to planting that you select plants that will thrive in your landscape. You should remember that your garden or outside space has a little microclimate all of its own, and everything from the soil type, hours of sunshine, even the slope of the land will affect which plants and materials will work best.

garden design plan

2. Think about who are you designing your garden for?

There are many different purposes for a garden which are important when consider when planning out your garden:

  • Is it a calming place where adults can relax?
  • Do you want to use it as a social space?
  • Do you want to dine outside?
  • Do you have children who will want to run around and play?
  • Do you have pets that might want to scratch or chew, or dig things up?

It is very important to have a clear idea of the functionality of the garden so that you can source the right materials as well as ensuring that the whole family are happy with the finished product.

3. How easy does your garden need to be to maintain?

landscape gardening materials

How much work are you willing to put in to keep it looking good? How often realistically will you be using it? These are important points to consider when deciding on what materials you need to buy. If you want a garden that you can leave to its own devices then bare that in mine when you are buying your materials. If you want a garden that is also a hobby then equally source the correct materials to ensure it meets those demands.

For any advice and information just call us on 01306 877540

4. What kind of style do you want your garden to be?

Have a clear idea of the style of your garden, often the most beautiful and successful landscaping projects are built around particular themes. Do you want a scented garden, one bursting with flowers and colour, a serene place to stretch out and relax, or perhaps even an Oriental garden? Of course if your outside space is big enough you can create different spaces and zones within it. Have a planting strategy and use different hardscapes to separate areas. Build walkways in-between the areas to guide people to them. It is good to consider your personal tastes and often looking to the style of your home can help you decide. Do you like things to be clean, neat and ordered or do you prefer a softer more romantic feel? Getting the style right is imperative to ensure you get the most out of your garden.

Landscaping supplier materials

5. Pick plants that work for you

Another important piece of landscaping advice it to ensure you pick the right plants for you. Plants can be used in a variety of ways to give your garden shape and structure. You can use them to create neat borders, to corner off different sections and also to provide beautiful visual scenery. If you have an area of the garden you want people to, pay particular attention to using striking, bright plants will highlight this. You can also think about other materials such as plant pots, ornaments and clever outdoor lighting to make your garden look exactly as you want it to be.

landscape gardening materials

If you live in a noisy area, choosing the right plants can make a huge difference when it comes to creating a little oasis of calm. Selecting denser trees and bushes will help block out unwanted noise, as will selecting sturdy fencing materials will help insulate your garden from noise outside it.

A landscaping project is truly exciting, and the satisfaction of creating your own perfect outdoor space is very rewarding. Planning in advance and asking the right questions early on can save you time and money and ensure the end result is exactly what you had in mind. At Bury Hill we supply high quality landscaping materials including; lawn turf, decorative stone and building aggregates. Contact us with any questions or for a free quote. - http://www.buryhilltopsoilandlogs.co.uk/contact_us.php

How To Be a Self-Sufficient Gardener & Practise Sustainable Gardening in 2014

Becoming a self sufficient gardener

Becoming a self-sufficient gardener simply means learning how to grow your own fruits and vegetables in a way that’s harmonious with the environment. This is also sometimes known as ‘sustainable gardening.’

 self-sufficient-gardening

This means that you won’t use harmful pesticides, and that you’ll recycle garden waste into compost that can be reused in the soil where your garden grows. In an age in which many people are trying to live healthier lives, growing and maintaining your own garden is an effective way to ensure that your family eats fresh, nutritious food that combats toxins and promotes an overall healthier lifestyle. You don’t need a lot of supplies to embark on your self-sufficient adventure; you just need to decide on a few things before you get started.

The first thing you must decide on is whether you are going to grow your vegetables indoors or outdoors. If you have a house, then even a small backyard can be used to plant seeds. But if you lack a backyard or an outdoor space, you can still grow some foods in indoor containers. The one thing you’ll need is plenty of sunlight and water for your seedlings to grow. Some vegetables, such as tomatoes, do require more space and are very difficult to grow indoors unless you have set up ample space inside.

Organic-Compost

The second thing you have to decide is what you are going to grow. With a few exceptions, vegetables and herbs are the easiest foods to grow and usually yield a harvest in two months or less. However, depending on what you’re growing, there are different requirements for the plants to flourish. Some vegetables need a lot of sun and can withstand hot temperatures, whereas others need less light and are likely to wither when it’s very hot. Where you live will determine in large part what you grow. If you reside in a very cold climate, then certain kinds of vegetables will not flourish in your climate.

prepare-garden-for-winter

Similarly, a very hot climate may preclude you from growing vegetables whose seedlings do not respond well to extreme heat. One of the main factors in deciding what you want to grow is you and your family’s likes and dislikes. Vegetables such as tomatoes, onions and salad are popular with a lot of people because they’re versatile enough to be used in a number of dishes, which maximises your self-sufficiency.

The next thing you have to do is make sure the soil you’re using is optimal. This is more important in an outdoor garden, where you can’t really control the soil quality. Indoor containers by definition will be composed of soil you select, so the prep work for an inside growing area is not as vital as for an outdoor. Soil is different everywhere, so after you’ve decided where your outdoor garden will be located, you have to clear out rocks, which are an obstacle to the growth of plants. Though it’s not an absolute necessity, you can buy a small kit to determine the pH level of your soil. This information can help you choose the right kind of vegetables to grow in your garden.

tomatoes

After you make these three decisions, you’re well on your way to becoming a self-sufficient gardener. Remember, it’s not about trying to become the ultimate green warrior. Start small, and as you achieve success, add on to what you’ve already grown. Soon, you’ll be waving goodbye to your grocery store produce section or farmer’s market, because you have everything you need at home.

We are one of the leading topsoil suppliers in London and would be glad to provide landscaping advice or help you with any queries you may have about your next landscaping project.

Autumn Gardening Tips – How to Prepare your Garden for Autumn

September in many respects is one of the most important months of the year for many keen gardeners around the UK. The summer season is drawing to an end and it is time to start planning ahead for the longer nights, colder wetter weather and winter frosts beginning to bite the ground.

Having said that, the prospect of preparing your garden for autumn is a tremendously exciting one, so here at Bury Hill Landscape Suppliers we have put together autumn gardening tips for getting your garden ready for a change in the season.

prepare-garden-for-winter

Like most things in life, it’s better to get ahead of the game and start as early as you can – and the same is true of preparing your garden for the autumn / winter season. It’s important to give yourself plenty of time and get yourself and your garden organised.

10 Tips for Preparing your Garden for Autumn / Winter

1. Dig Up Those Annual Flowers

Quick and easy to grow, Annuals are fantastic for bringing vibrant colours and visual diversity to any garden in the UK. It may seem counter-productive to uproot up these plants that looked so good during the spring and summer months, but it needs to be done.

annual-flowers

Annuals are great for a single season, but tend to struggle in the winter months and can be a real liability to maintain during Autumn. Get the most out of your Annuals by uprooting them just before the seasons turn and adding them to your compost pile.

2. Add Fertiliser to your Lawn

Why would you add fertiliser to your lawn? Do you need to add fertiliser to your garden’s lawn? All plants and lawns need good quality fertiliser or nutrients in order to maintain healthy growth. The majority of plants tend to absorb their nutrients through their roots, but you can give nature a helping hand by adding a good quality lawn fertiliser before your garden faces the autumn / winter season.

3. Cover Your Garden’s Pond

As long as your garden’s pond is a manageable size you should have any issues here. If it’s large and you’re unable to effectively maintain it during the winter months, it’s best to do a cleanse of leaves, gunk and other undesirable materials before it gets too cold. This will reduce the amount of clearing work you’ll have when spring comes around.

Garden-Pond-Winter

By covering your pond with a net you’re preventing the majority of autumn’s falling leaves from polluting the water. In severely cold weather, try to prevent the whole pond from freezing over to give any wildlife the best chance of survival during the winter months.

4. Cut Your Garden’s Perennials

Perennials will grow and survive almost all-year round. Surviving ground frost and growing like it’s nobody’s business. To some they can be a pain, so it’s important to cut them back ahead of the winter to prevent your garden from being dominated by them.

perennial-flower-garden

Before winter kicks off just cut your Perennials back to soil level and dispose of all of the cuttings to prevent further growth in other areas of your garden.

5. De-Weed Your Garden

Weeds are a pain for most gardeners in the UK and if you don’t get them under control prior to the beginning of winter you could face a massive de-weeding job on your hands come springtime. Whether they’re populating your garden’s flowerbeds or lining the cracks between your patio pavement, make sure you attack those weed by removing them from the root. Weed-killer solutions are OK but using it against other plants will have a negative effect on them.

6. Cover Your Garden Furniture and Store Your Tools

It’s important to keep your tools in a safe, dry and secure place all year round anyway, but never more so in winter when the wet and cold weather can cause rusting and general deterioration to your, no doubt, expensive gardening gear.

covering-garden-furniture-winter

Use covers to keep your garden furniture safe from the elements as well. Unless you’re using it every other day it’s not such a big deal to remove the cover when you need to use your outside furniture. Better to keep it looking in top condition by covering it during the months where the weather can have a detrimental effect on it.

7. Sow Cover Crops into your Soil

A cover crop is essentially used to manage and hopefully reduce the amount of soil erosion, its quality, fertility, diseases and other negative problems your garden may experience during harsh winters. Cover crop growers can reduce the pressure on some herbicides, potentially, and reduce fertiliser costs, while also increasing the organic matter content and structure of the soil.

Need a couple of ideas? Annual ryegrass, winter legumes (winter peas, vetch) and oats will all do a very good job indeed.

8. Protect Young Trees and Plants

Just like us, young trees need plenty of attention and protection as they grow. This is particularly true during the winter months when the weather takes a turn for the worse. Start off by getting a few rolls of tree-guarding wraps to protect the trunks.

wrapping-young-trees-winter

Click here for more information on how to effectively protect young trees during winter.

9. Organic Compost & Mulching

Give your garden beds a few inches of compost all over and finish off the process by adding a later of mulch. This effective strategy ensures your lot is given appropriate protection from rodents in addition to plenty of nutrients.

10. Keep an Eye on Those Roots

Novice gardeners often make the mistake of removing plants completely, including the roots. The preferred method is to cut the plant at the surface, giving the roots the chance to aerate your garden soil.

Extra Tips for Maintaining your Garden in Winter:

1. How to Maintain Your Greenhouse

For many UK gardeners the greenhouse is an essential  part of their garden, sheltering the more fragile and exotic plants from the sometimes harsh British climate and accelerating the growth of others. It is always wise to give your greenhouse a bit of tender loving care a few times a year, especially ahead of the winter season taking hold.

benefits-of-greenhouses

As much as anything else, you will need to give the glass panels a good clean to remove any dirt or grime that could potentially block the flow of sunlight hitting your plants. Due to there being less sunlight to work with during the winter, you will want to ensure that you get the most out of what is available. Similarly, you will want to ensure that any overgrown trees that could possibly put your greenhouse in the shade are trimmed back.

2. Emptying Your Compost Containers

No doubt you will be adding plenty to your compost bins, as you make provisions around your garden for the onset of winter. The autumn months are the perfect time of year to use all the compost you have collected over the preceding months.

where-to-build-compost-pile

As we all know, compost is an invaluable resource to use around the garden, so use it generously and give what is left in your bins a little stir, so that the decomposition process occurs faster. If there is one golden rule of gardening, it is that you simply cannot ever have too much compost.

3. Look After Your Gardening Equipment & Tools

Autumn is the perfect time of year to give your garden equipment a general health check and service where required. Should anything need to be replaced, you can strike while the iron is hot and head down the garden centre to fetch some replacements. Give your lawn mower a service to ensure it is in crisp working order for when you next need it.

care-for-garden-tools

You may also wish to check your shears and trimmers to ensure they are still sharp enough to do an effective job of keeping the garden in check. Same goes for forks, spades and rakes etc. Give them a clean if they need it and take time to ensure they have not been subjected to the onset of any rust. It would also be wise to apply some oil both to the wooden parts of your manual tools and also to the moving parts of your electronic machinery.

To purchase high quality topsoils and other landscaping and gardening supplies please contact us on 01306 877540 or visit our online store.

8 Super Healthy Foods You Can Grow at Home

Environmentalists and nutritionists have been nagging us for years, and despite the severe growth in obesity in the UK and America – there are many of us who, actually, prefer taking the healthy option when eating. Exercise is on the rise, reflected by a 144% increase in the amount of people who cycle to work in London from 2001 to 2011.

The good news is that the amount of adults and children that are regularly consuming their recommended daily portions of five fruit and vegetables is on the rise.

Vegetables-You-Can-Grow-At-Home

That’s a positive for sure, but how can we continue this trend and continue to eliminate bad eating habits amongst the UK population? Well, what about growing your own super healthy foods in your garden at home? You don’t need a degree in nutrition, you don’t even to be an experienced gardener to grow your own fruit and vegetables – you simply need the know-how and ambition to succeed.

For healthy gardening a little education goes a long way. How else are you supposed to know what’s out there and what’s easy for you to grow in your own garden. Below is a list of ten super healthy fruits, vegetables and herbs that are not only incredibly good for you and your family to eat, but don’t necessarily require you to have a ‘green thumb.’

1. Broccoli – Nature’s Super Hero

Grow-Brocolli-at-Home

Health Benefits of Broccoli

Broccoli is one of the world’s best ‘super-foods,’ a real super hero of the vegetable world; filled with vitamins and nutrients that reduce cholesterol (when steamed) and help remove toxins from your body.

It’s also packed with vitamin D to keep our metabolism in good working order. The list of health benefits of broccoli, which include anti-inflammatory benefits, strong effective antioxidants and strong evidence to reduce the risk of caner, goes on and on. Not only is broccoli

How to Grow Broccoli at Home

Broccoli seeds are to be planted in an indoor container first, then transplanted outdoors when the seeds sprout once they’re roughly 4 – 6 inches in height. For best results use high nitrogen fertiliser with well-drained, moisture-retentive soil.

Make sure you water every 10 – 14 days during dry periods. It usually takes about two to three months of growth before you can harvest your broccoli, with that in mind it’s best to sow your seeds in March / April with a view to harvesting them in June / July.

2. Cauliflower – Nature’s Nutritional Powerhouse

Grow-Cauliflower-at-Home

Health Benefits of Cauliflower

Like broccoli, cauliflower is another nutritional powerhouse that doctors strongly recommend as a key part of a healthy diet. Cauliflower is rich in absolutely loads of vitamins and minerals; namely very healthy 77% dose of your daily recommended value of vitamin C, a fantastic source of vitamin K, protein, magnesium and so on.

Additional benefits include digestive assistance, antioxidants and detoxification support as well as containing sulforaphane which, like its green cousin Broccoli, has been shown to fight cancerous cells – win/win!

How to Grow Cauliflower at Home

First things first – cauliflowers flourish in very fertile soils, so we’d recommend you dig in a bucketload of well-rotted manure or organic compost prior to planting your seeds. We have a good selection of high quality soil conditioners, organic composts and mulches in our store. Make sure you firm your soil well (treading it down is fine!) before you plant your seeds.

Aim to space your cauliflowers roughly 2ft apart and water well every 10 days if you’re suffering from particularly dry weather. Similar to broccoli, cauliflowers are ready for harvest in about two months.

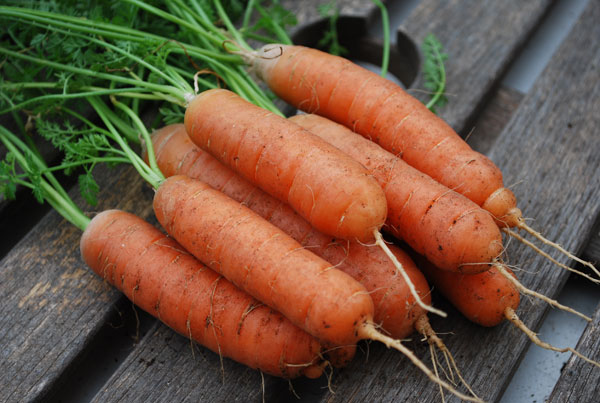
3. Carrots – Do They Really Help You to See in the Dark?

Grow-Carrots-at-Home

Health Benefits of Carrots

Remember when you were a child and your parents told you to eat carrots to help you see in the dark? Well, they weren’t lying to you because carrots are absolutely loaded with vitamin A, which is vital for good eyesight and to boost the immune system.

Additional benefits include slowing down the ageing process due to high levels of beta-carotene acting as an antioxidant to skin cell damage done by regular metabolism. High levels of vitamin A assists with body cleansing, healthy teeth and gums, preventing heart disease as well as being a powerful antiseptic.

How to Grow Carrots at Home

It’s best to grow your homegrown carrots in open ground rather than containers, but luckily they don’t need too much TLC to grow effectively. Carrots are particularly drought resistant and don’t need watering as much as your other homegrown vegetables, however if they start looking a little wilted you can always give them a good soaking every 2 weeks or so.

You can plant carrot seeds in fertile soil, and typically, they take anywhere from a week to three weeks before they sprout. Best time to sow your carrot seeds can be anytime between February to July, and then full growth will take about two to three months.

4. Lettuce – More Than Just ‘Rabbit Food’

Grow-Lettuce-at-Home

Health Benefits of Lettuce

Unfairly dubbed ‘rabbit food’, lettuce is so much more than simply a boring weight loss alternative. With surprisingly incredible health benefits a more fitting name for lettuce would be ‘monster food’.

Lettuce comes in all shapes and sizes but by far Romaine Lettuce is our out and out winner here. Romaine Lettuce has almost zero fat, it’s low calorie, and therefore hugely helps with weight control and loss. Complete with tonnes of protein, Omega-3 and vitamin C lettuce is, without a doubt, a real superfood and rightfully deserves its spot on our list of super foods!

How to Grow Lettuce at Home

Lettuce is easy to grow and flourishes both in indoor containers and in an outdoor vegetable garden. Thin your lettuce seedlings once your first leaves start to appear and continue doing so until the plants are roughly 30cm apart. As with all vegetables it’s advised that you water well during dry periods every 2 weeks.

5. Broad Beans – Ultimate Health Booster

Grow-Broad-Beans-at-Home

Health Benefits of Broad Beans

Broad beans are a vegetable staple and packed with vitamin C, potassium, iron and fiber. They’re one of the easiest foods to grow. All you need is the seeds, good soil and an area where there’s loads of sunlight.

We’re not joking when we say that broad beans are some of the healthiest vegetables that you can eat. Eaten raw, steamed or stir-fried, broad beans are a fantastic source of many nutrients that can help you boost your health.

How to Grow Broad Beans at Home

In fertile and well-drained soils, that has been well-dug and ideally improved with organic compost, with plenty of sunshine broad beans can be sown in early November or February for harvest as early as May and June. Sow your broad bean seeds roughly 2 – 3 inches deep and hoe regularly to avoid weeds.

In dry periods soak plants well at the start of flowering and continue every 10 – 14 days or so. Staking may be required for taller cultivars, use string attached to tall(ish) stakes in the soil for the broad beans to follow.

6. Basil – Ideal for Indoors Gardeners

Grow-Basil-at-Home

Health Benefits of Basil

Basil is a herb that enhances flavour and gives foods an aromatic, pleasant taste. There are over 60 varieties of basil, so you have a lot of options here. A great source of vitamin A, magnesium, copper and vitamin C – basil’s nutrients are essential for positive cardiovascular health.

How to Grow Basil at Home

Basil is really easy to grow at home. All you need are the seeds, and even if you don’t have a garden, you can grow it indoors with a small pot or container with well-drained soil. It takes about six to eight weeks for the seeds to harvest for use, and you’ll need lots of sun for the basil to grow, but avoid intense heat or it could damage the herb.

7. Tomatoes – Sweet, Juicy and Delicious!

Grow-Tomatoes-at-Home

Health Benefits of Tomatoes

Another ‘superfood,’ tomatoes are rich in lycopene and antioxidants, and are used in everything from pasta sauces to salads. Packed with vitamin A, C, K, potassium and easy to grow yourself – tomatoes have rightfully earned their place amongst our list of super foods you can grow at home.

Full of beta-carotene, tomatoes help protect your skin from sun damage, build strong bones and have even been proven to fight cancer with high doses of Lycopene. Also a great fruit for diabetics as they can assist with keeping your blood sugar levels in line.

How to Grow Tomatoes at Home

Tomato seeds are best planted outdoors in a spot that gets a lot of sun and require watering several times a week. Tomatoes can take as much as two months to harvest. You can grow them in either planting bags, outside soil or even hanging baskets. Similarly to broad beans, tomatoes can also be grown against stakes. Tie the main stem with string (once stemmed) to a vertical stake in the ground and water regularly to keep your soil/compost moist.

Tomato seeds can be sown from February – April and can be harvested anytime from August – October.

8. Beetroot – Nature’s Hormone Booster

Grow-Beetroot-at-Home

Health Benefits of Beetroot

Beetroot isn’t known for being a child’s best friend, and you may have unpleasant memories about your parents making you eat them, but they’re one of the most nutritious foods out there. Beets contain vitamin C, folic acid, potassium and iron, all vital building blocks for good health. Add it to a salad or blend it with apple and orange juice for a refreshing smoothie – ideal for a full body cleanse.

A surprising fact about beetroot is that it’s nature’s viagra – we’re not even joking! The plant contains high amounts of boron, which is directly linked to the production of human sex hormones.

How to Grow Beetroot at Home

Plant your beetroot seeds outdoors several inches apart, and make sure you water every day, and twice a day if the temperature is hot. The vegetable will be ready to harvest in about two months if you ensure your soil is well-drained and fertile.

Seeds can be sown from March to July, and then harvested from July to October. As with most vegetables it’s important to water them well during dry periods, every 10 – 14 days.

Well, there you have it! Our list of 10 super healthy foods you can grow at home ends here we’re afraid. Keep an eye out for more gardening and landscaping advice from our blog, and if you’d like any further information, topsoil, organic compost or landscaping supplies please get in touch with us.

If you have any questions about growing healthy foods at home or need some gardening advice, contact us at www.buryhilltopsoilandlogs.co.uk. We are one of the leading topsoil suppliers in London and would be glad to help you grow vegetables yourself.

How to Care for Your Lawn Turf

Picking the right pre-rolled lawn turf is only the first step to achieving a luscious garden you can be proud of. You can spend hours and hours selecting a top product, but without the right aftercare you won’t get the results you’re looking for.

The key is in remaining consistent. Your lawn needs attention on a weekly, if not daily basis – ensure it’s kept just as you would like it by following these tips.

stripy-lawn

Watering Your Lawn Turf

The main thing you should think about is keeping your lawn turf moist, especially if it’s brand new. Do your best to make sure it doesn’t dry out, or you’re setting yourself up for failure right from the get go!

For the first week, water your lawn turf 2-3 times per day. You can use automatic sprinklers to make the process a little easier, and there are absolutely loads of different systems that work well and automate the process. Set your system to work for half an hour to 45 minutes per watering session. If you notice your lawn going brown, increase the amount of times you water the garden.

It’s important to cover absolutely all areas of your turf, paying specific attention to the corners and outer edges. These areas are particularly vulnerable to being missed by many sprinkler systems, so it’s key to ensure that you distribute the water evenly.

Once the week is up, once per day should be enough for the rest of the month. You can even reduce the sprinklers to work for just 15 minutes daily. Depending on the dryness of your climate, you can reduce watering to just a couple of times per week.

If you’re laying your lawn turf you should really start watering within half an hour after it has been laid over your topsoil. Apply at least 2 – 3cm of water so the soil beneath the turf is very wet.

Some soils may result in ‘runoff’, especially in sloped areas of your lawn. If you notice ‘runoff’ occurring turn off the water and restart within 30 minutes to an hour. Hopefully this will ensure adequate soaking-in taking your lawn one step closer to a lawn you can be proud of.

Tips for Mowing your Garden Lawn

If you’ve just installed your new lawn, you don’t need to start heavy mowing straightaway. A light trim is enough after a fortnight of leaving nature to do its work. After that, you should look at mowing every 7-14 days if possible.

Depending on your lawn, adjust your lawnmower accordingly. For example, couch lawns should be trimmed to around 15 to 25mm, while buffalo lawns required 45 to 60mm to stay healthy.

If you’re not quite sure on the ideal length, check with a professional or the shop you originally bought your lawn turf from. They will tell you exactly what you should be doing.

Lawn-Care-mow

Fertilising Your Lawn Turf

Keeping those lovely juicy nutrients reaching your lawn turf is one of the best ways to keep your garden in tiptop condition. Apply these on a regular basis – every 6 to 8 weeks is preferable.

Remember to get your hands on a quality product, not cheap chemical fertilisers. These may save you a couple of pounds, but in the long run will simply damage your garden by not giving it the nutrients it needs.

Finally, keep in mind that each fertiliser product uses its own compounds and mixtures, meaning they each need to be treated differently. Follow the instructions to the letter to get the best results.

Ask The Professionals

Don’t be afraid to turn to professional help, even if you have quite a good amount of experience in gardening. It’s important to get the framework of how you should take care of your lawn turf correct right from the get go – that way, you set yourself up for a healthy lawn that will stand the test of time.

It’s possible to employ a third-party for a consultation, where they will give you the required information to do everything yourself once he or she has left. That way, you don’t have to pay for a professional to do your garden, but you can deliver a similar level of care yourself.

Article written by Bury Hill Landscape Supplies Ltd.

Bury Hill Logo

Bury Hill Landscape Supplies Ltd. provides a wide range of landscape gardening products to all areas of the UK, including premium grade topsoils, lawn turfs, seasoned firewood logs, organic composts and soil conditioners.

Visit www.buryhilltopsoilandlogs.co.uk or call 01306 877540 for more information.

Allotment Planning Tips for Gardeners

Having your own allotment is fantastic for urban residents, and those that don’t have space for vegetable growing in their own garden. Allotments give gardeners immense satisfaction in being able to grow, nurture and eat crops they’ve grown. It’s also a great way to get you on your way to becoming a self-sustaining part of the community, not to mention the amount of fun it is to simply have an allotment to spend time in.

Here’s our advice and allotment planning tips for budding gardeners here in the UK.

Allotment-Advice-Tips-UK

However, owning your own allotment isn’t a walk in the park by any means. It requires commitment, involvement and forward planning. To get the most out of your allotment, have a read of the following tips and keep them handy for when you decide to get going with yours.

Applying for an Allotment

Initially you’ll have to apply to get your first allotment. Unfortunately this can take time, as waiting lists are usually long, especially for those living in London and built up areas. To get started, contact your local authority to be put on the waiting list; including your Parish, Town, City or District Council.

Allotment-How-To-Advice-Guide

Alternatively you can apply for your allotment here via the Government’s online submission form. This will either allocate you a plot of land, or add you to a waiting list – either way it’s the best way to get started.

First Things First – Clean Your Plot

So you’ve been allocated your first allotment, and chances are it’s not in top condition for growing your own vegetables, plants and crops. First port of call would be to get the elbow grease out and clear your plot of any existing plants, pots, rubbish and soil.

Before you can start growing anything you need to ensure your plot’s soil is in absolutely top condition. This is a key step, as once you start planting it’s very difficult to get back to square 1 without any major repercussions.

Digging-Your-Garden-Soil

A little online research will help you find out enough information on what type of soil you need to grow your desired crop. Alternatively visiting your local garden centre or speaking with a landscape supplier like Bury Hill Landscape Supplies Ltd will give you a step in the right direction.

For more information take a look at our high quality range of contract and premium topsoils for sale.

Once you know what and how much topsoil you need to order, dig out the existing soil whilst removing any weeds and unnecessary remains. Turn it over carefully and diligently – don’t take any shortcuts. Doing this will help you tremendously when it comes to the results of your allotment.

Grow Unique Vegetables

Many organic vegetables are grown en mass, and are readily available in the United Kingdom. We’re talking dietary staples such as carrots, lettuce leaves, onions and potatoes. A delivered veggie box may be more than enough to get your weekly dose of these base items.

Growing-Unique-Vegetables-UK

What can really set your allotment apart is growing those unique veggies you won’t find in your average supermarket or even the nearest organic farm. Black potatoes, Italian onions, and purple carrots are examples of vegetable that are just a little harder to find.

Of course it comes down to personal preference, but a little originality goes a long way – plus it’s fun and impressive for when hosting dinner parties.

Know Your Seasons

Most crops and plants follow a strict schedule for when they should be planted throughout the year. In the United Kingdom you can’t expect to grow whatever you want throughout the year, no matter the weather or soil conditions.

The fact is that nature follows a firm calendar. Understanding and getting to know it will help you tremendously.

UK-Seasons-Growing-Veg

For example, April is the month where those nasty pests tend to start giving problems. May is a little dry, meaning that you have to invest in watering your allotment on a regular basis. June is best for the so-called ‘tender’ veg, while October is ideal for broad beans and garlic. Knowing your seasons inside and out will allow you to maximise your garden’s options.

Draw and Measure (aka Planning)

This one is particularly important, especially as most allotments are fairly limited on space. It’s critical that you’re aware of just how much space you have available and whether your grand plans of growing every vegetable known to man is actually feasible.

Planning-your-Allotment

Make plans, draw up blueprints if necessary and take it slow. Nightmare situation would involve buying all your pots, seeds and soils before you’ve been to measure up your allotment. Know its limitations and use smart planning to make the most of what you’ve got to work with.

Be Realistic with your Targets

Many would-be organic farmers completely overestimate how much time they’ll have to spend on their newfound allotment toy. While it may seem exciting to spend every day after work tending to your garden, it gets old rather quickly if you’re not careful.

While it’s certainly a fun and fulfilling thing to invest in, it also requires quite a bit of time. Don’t get over-excited and commit more than you can handle. Be realistic with your goals and you’ll get the most out of your allotment.

So there you have it, hopefully you’re feeling inspired and confident to go out there, reserve your allotment and start growing! For more information on landscape and gardening supplies feel free to contact us on 01306 877540 or visit our website.

Toung and Groove

Guest Post: Tongue and Groove Vs Shiplap Garden Sheds

A garden shed is a great addition to any garden; they can be used for so many different purposes. The most popular use for garden sheds is to store garden materials or tools, like lawnmowers and barbecues. They come in many different shapes and sizes to suit any garden or lifestyle.

Toung and Groove

The cladding on the outside of a shed is not just cosmetic; it helps to protect the shed from water penetration and weather damage. Tongue and groove cladding is the most popular styles of cladding. The timber used to build sheds with tongue and groove cladding has been specially shaped so that all the panels interlock. The interlocking system prevents water from penetrating the wood, protecting the shed from water damage and rot.

Tongue and groove cladding also makes sheds stronger, the interlocking timber creates a strong panel, which is very durable. Tongue and Groove sheds are always recommended if you want to use your shed to store heavy items or valuable items. Tongue and groove makes a stronger shed, which is harder to break into.

Shiplap-sheds-garden

Shiplap tongue and groove sheds share many of the same qualities as regular tongue and groove sheds, but the Shiplap has one special feature. Shiplap cladding has a little channel running along side the timber. This little channel or groove, allows water to run off the shed very quickly. This also helps the shed dry quickly after exposure to rain, helping to protect it from any water damage. Shiplap tongue and groove cladding also gives sheds an attractive appearance and has a robust and sturdy structure.

The third type of cladding is overlap; overlap is exactly how it sounds and rather than the panels interlocking like the shiplap and tongue and groove claddings overlap one another. This is a popular design and probably the most recognised if you are a newcomer to sheds. The overlap panels ensure that rain water runs off the shed creating a reliable design. It is the cheapest of the three claddings and perfect for any storage shed.

So Which Should you buy?

It is clear from the descriptions above that overlap panels do not have as many attributes and features as shiplap or tongue and groove cladding. It is also the most affordable type of garden sheds cladding and the reason for this is because it has the least protection from rainwater making it the least reliable.

This does not mean that it is unreliable just that the other two types of shed cladding namely tongue and groove and shiplap are designed more effectively to increased the reliability and durability.

Many people confuse this information whether it is the way it is worded or just the negative description that has been read but we ant to ensure that you do not perceive overlap cladding as unreliable because it isn’t. The main difference between the claddings is the overlapping and interlocking wood panels. There is a greater chance of water entering the shed via overlapping panels than interlocked as there are gaps occasionally on overlap cladding sheds.

The overlap design is still created to reduce the chances of rain water entering the shed which is why the panels overlap each other allowing the water to run off the shed rather than in. The most important factor and element that should be taken into account when deciding which cladding of shed to buy is what you are going to store in your shed and use your shed for.

This has a large impact on what type of shed cladding you will need for example if you are looking to store large equipment then I would not advise an overlap cladding. Overlap cladding is ideally suited to storing generic storage items such as garden furniture and tools but heavy equipment you may use for hobbies or sit down lawn mowers will be more suited to tongue and groove or shiplap sheds.

If you have a small budget overlap cladding is ideal as it is cheap and cheerful and does the job superbly. Like earlier in the article we stated it is not unreliable just not as enhanced as the other cladding types. I keep on reiterating this point as it is a debate that continues and overlap cladding seems to gain a large amount of negative views but for the affordability the sheds offer that are designed from this cladding it should be given credit rather than criticism.

Middle of the range is tongue and groove cladding and is less expensive than shiplap cladding but has an extensive range of benefits. Shiplap is seen as an expensive item so the middle of the range tongue and groove appeals to many, more than overlap cladding but if you are looking to store heavier and larger items it is a worthwhile cost. If you have the budget then shiplap is a lovely perk but not necessary for many people. Most people are suited to a tongue and groove cladding for the uses that they have for their garden sheds and this would be my advice if you are looking to buy a shed in the near future.

To summarise an overlap shed is ideal for generic garden items that you need to store with shiplap being a luxury if you can afford it whilst tongue and groove is affordability and quality rolled in to one.

For more information on sheds and cladding options visit Waltons. We want to educate you on what is best so you can make the right decision on which shed to buy rather than being pushed in to it by a sales person.

Growing-Carrots-UK

Five Very Easy Vegetables To Grow in the UK

If you’re thinking about venturing out into the world of DIY gardening, there’s no better time to start then the spring or the great British summer. With the occasional day of sunshine and plenty of rain, conditions to grow vegetables in the UK are seemingly perfect, and a contrast to the UK’s recent harsh and devastating winters. Although despite the frequent changes in weather, it’s easier than you think to grow vegetables at home.

Vegetables

As more people are becoming environmentally conscious and turning ‘green,’ there are more tools than ever available for people to create their own garden. But you may have no idea what vegetables are the easiest to grow, or how to get started with home grown food, which is no problem. With a few seedlings, the right kind of good quality soil and plenty of water and sunlight, here are five easy vegetables to grow in your garden.

1. Lettuce and Salad Leaves

‘Ready made’ bags of salad leaves from supermarkets are expensive and have a very limited shelf life. The advantage of growing your own doesn’t stop at the pure fun of it; you can pick exactly how much you need for every meal whilst the leaves continue to grow.

Whether you’re growing an Iceberg, Romaine or Round Lettuce; salad leaves are one of the most versatile foods you can grow. The good thing about growing salad is that you can do it indoors or outdoors, which is ideal in the UK, where cold weather can sometimes play havoc with an outdoor garden. Just decide what kind of salad leaves you want to grow, which are all packed with nutrients, buy the seedlings and plant them. Whether you’re growing them inside or outside, salad seedlings need plenty of sun and water. The leaves are ready to harvest usually within 30 days.

Top Tips for Growing Salad Leaves in the UK:

-       Choose a sunny part of your garden to plant your seeds.

-       Prepare the soil by digging over, and remove any stones and weeds.

-       Mix in your organic garden compost.

-       Sow your seeds in short rows, about 30cm apart then cover with soil.

-       Keep soil moist to ensure good growth.

-       Harvest leaves after about 30 days, when the plants are 5cm high. You can let them grow to around 15cm high as well.

-       For a continuous supply, sow your lettuce seeds every 4 weeks.

Check out the British Leafy Salad’s leaf guide for more information on what you can grow here in the UK.

2. Tomatoes

Loaded with lycopene, tomatoes are one of nature’s ‘superfoods,’ and used in everything from salads to sandwiches to pasta sauces. You can grow tomatoes indoors or outdoors, depending on how big a yield you want, but either way, select a place that receives a lot of sunlight. Tomatoes really can be one of the most rewarding vegetables to grow in the UK as they’re easy to grow from seeds as long as they’re in a warm and slightly sheltered spot. Greenhouses give the best conditions for year round tomato growth in the UK, but good conditions outdoors can be worth the risk.

Seeds germinate within two weeks, after which, you should transplant the leaves into individual containers if you’re growing the tomatoes indoors. You can also buy tomato plants and transplant them into your outdoor garden or indoor container. Tomatoes harvest in about 60 days.

Top Tips for Growing Tomatoes in the UK:

-       All tomato seeds need fertile soil, plenty of regular sun, heat, food and water.

-       Scatter your tomato seeds thinly in a 8cm pot and add organic garden compost, then cover with a thin layer of vermiculite.

-       Seedlings should appear within 2 weeks, and then large enough to move into separate larger pots within 8 weeks.

-       Always ensure roots are covered with soil, and make sure you water them regularly so that the soil is moist and not overwatered.

-       It’s best to grow a single-stemmed plant, so make sure you snap off shoots that grow from leaf joints. This will ensure all of the plant’s energy goes into producing fruit.

-       Water the plants daily!

-       Harvest when your tomatoes are a nice healthy red colour; if they’re green try putting them with a banana to encourage them to ripen.

3. Onions

Onions are used in nearly every main meal, as a flavour enhancer, to add zest and to give body to the food. Growing onions is very easy, requiring very little maintenance once you’ve planted the seeds. However, it takes several months for onions to harvest from seeds. You should always plant onions four to six weeks prior to the last frost.

First call of duty is to decide on which type of onion you’d like to plant and harvest, from spring onions to shallots – they can all be grown from seed in the UK.

Top Tips for Growing Onions in the UK:

-       A sunny patch of your garden with good drainage is key for growing a good crop of onions.

-       Light soils are best, as long as it’s fertile soil with a small amount of nitrogen.

-       Sow your seeds in January or February when it’s 10 – 15 degrees.

-       Cover your seeds with most soil and vermiculite.

-       Regular weeding is essential.

-       Harvest when the leaves start to yellow and die black.

4. Peas

Peas flourish even in colder weather, which makes them ideal to grown in the UK, where temperatures are known to become chilly. Peas are best sown from Spring to early Summer, when the soil is moist and warm. You can plant them indoor or outdoors in direct sunlight, and water the soil once a week. Peas will harvest in about three months.

It’s important to remember that peas come in two varieties; shelling peas and mangetout. The difference between the two is more than just taste and appearance as shelling peas mature at different times of the year. Either way, peas require a sunny, nutrient-rich part of your garden to grow that is able to retain water.

Top Tips for Growing Peas in the UK:

-       Use bamboo canes, trellis or netting to support the plants growth.

-       Once peas have reached 2 – 3 inches in height add further supports to enable to the plant to grow.

-       Peas will be ready to harvest after 12 – 14 weeks.

-       Regular picking is vital for lovely fresh peas.

-       After the harvest, cut off the stems at ground level and let the nitrogen-rich roots to rot back into the ground.

Carrots

Carrots are a tasty snack eaten by itself, boiled or shredded over a nice salad. They’re rich with vitamin A, a necessary nutrient for good vision.  Carrots also work wonders for your immune system, making them another of nature’s ‘superfoods.’ Carrots are easy to grow in fertile soil and will usually sprout in about seven to 21 days. They will harvest in two to three months.

Top Tips for Growing Carrots in the UK:

-       Buy a good quality soil and take time and consideration to prepare your patch.

-       Start digging the soil over in late winter or early spring, and make sure you remove all stones and weeds before planting.

-       Plant your carrot seeds as thinly as possible, on a sunny dry day 1 inch deep.

-       Once the seeds have germinated, they’ll start to show rough leaves.

-       Harvest from June / July onwards, pulling up your carrots as soon as they’re big enough to eat.

For more information on landscaping, quality topsoils and organic gardening materials, please contact us at www.buryhilltopsoilandlogs.co.uk or call us directly on 01306 877540.

Bury Hill is a leading topsoil and landscape gardening supplier in Surrey, Sussex and London and would be glad to help you with all enquiries.

The Best Way to Add Compost to Plants

Compost is the result of lovely green and organic matter such as leaves, kitchen waste, vegetables, fruit, manure and grass cuttings, etc. once broken down (decomposed) into humus after a few weeks.

Organic-Compost

One of the top ways to give your planting soil an improvement in texture and growing health is by adding high quality organic compost. By doing this you will speed up the yielding process, improve quality of your garden in general, and give trees and shrubs a much-needed nutrient injection. But is it as easy as that? Knowing how to add compost to your garden’s plants can aid them to thrive and flourish, but your method and process is just as important.

There are several ways to add compost to plants – this article will give you a few alternative methods that will benefit different circumstances. There is no single solution, but rather a best way according to your garden’s requirements. Here’s our advice on the best way to add compost to your plants in a few different ways.

Where to Get Your Organic Compost From

It’s completely feasible to ‘grow’ your own organic compost, and the majority of experienced gardeners in the UK do just that. However it requires time, know-how and patience. We actually wrote a quick and easy guide on how to grow your own organic compost from scratch, which is worth checking out! It’s almost as easy as putting all your biodegradable waste into a container, stirring the concoction to allow it to oxidise until it’s decomposed enough for use … almost!

If DIY composting isn’t for you, then head on over to our online store to check out our range of organic composts. For example, our Mushroom Compost is ideal for soil conditioning, mulching, breaking up heavy soils and tree and shrub planting.

Till the Entire Garden

Tilling is the process of turning the soil over so some of the lower soil comes up and some of the upper soil goes down.The best time for tilling your garden is spring, as before you do so your soil must be both dry enough and warm enough for it to be effective.

For gardens that are in a particularly poor condition, it’s beneficial to dig up your existing plants and set them aside in pots. You can then mix your existing soil with plenty of nutrient-rich high quality organic compost, providing your garden the fresh start that it needs.

Garden-Till-Tilling-Advice

This complete overhaul should only be considered if you’re noticing poor results with existing plants or if you are seeing this as a labour of love! It’s going to take quite some time, but it may take your efforts to the next level.

Give Tired Gardens a Lift

For most gardens that just need an injection of quality over a complete restructuring from top to bottom, it’s more than enough to add a thick layer of compost on top of your existing soil.

The recommended amount varies, but a couple of inches should be more than enough. You can always top up the amount of compost in subsequent weeks. Monitor performance and alter accordingly – the key is to get to know your garden and giving it what it needs. This ‘sixth sense’ will only come with time and experience.

Dig Your Organic Compost Into Your Garden Beds

When you’re digging your garden beds, make sure you add your compost in at this stage. Give it a good mix with the rest of your planting soil. This will give it an added nudge in the right direction, giving your seedlings a the best chance of a good and healthy start in life. Make sure your compost is fully broken down before you mix it with your existing soil. Compost is usually ready when it’s a dark brown colour, crumbly and has an earthy smell. It’s not ready if it smells of ammonia, or if there’s any signs of mould.

Organic-Compost-Advice

This strategy works particularly well if you’re working with a garden that is being designed from scratch, as it means you won’t need to dig up existing plants; although it’s not a problem if you do have to dig up existing plants – it just takes more time and effort!

Compost as Planting Soil

There are several plants that grow extremely well when planted directly in compost. Pumpkin or tomato seeds are prime examples of this and you should see some excellent results. It’s worth reading up on which seeds and plants respond best to direct organic compost planting, as some will find the acidic or alkaline consistency of your compost too strong.

General Garden Compost Tips

There are several kinds of garden compost you can get your hands on, but the main piece of advice we can give you is to invest in quality over second rate composting products. Whether you’re looking at mushroom compost bought from an external supplier or whether you are building your own organic compost pile, it’s important that you keep quality at the forefront of your thoughts at all times.

Organic compost piles that are built half-heartedly or without patience will not yield desired results. Remember that it will take weeks for your ingredients to decompose – do you really want to wait all this time for subpar results?

For more information on gardening and landscaping supplies please contact us on 01306 877540 or visit our online store.

How to Bring Your Swimming Pool Area Back to Life

Bury Hill’s seven tips

Having a swimming pool in your garden offers numerous possibilities to unwind and keep your body in shape, especially for homes in the UK – what a luxury! But there comes a time, after the harsh autumn and winter weather, when this area of your garden starts to look a bit obsolete. When this happens, it’s important to invest some time and effort to revamp this oasis of joy and pleasure. Here are several tips that can help you bring your swimming pool area back to life.

Maintaining a Healthy Green Lawn

If a lawn is an integral part of this area, you should have it uniformly cut since the grass that is the same height will look crisp and clean. But in case your lawn has become dilapidated beyond repair, you have to replace it, removing the old grass and sowing new seeds or going for the more convenient lawn turf. You can learn about all the necessary methods for maintaining a healthy green lawn here.

Healthy-Green-Lawn

When it comes to existing plants, make them neat and tidy by pruning them. Remove dead plant material and use pruning shears to cut larger bushes and shrubs. You should also add some new plants, paying attention to their colours, shapes and sizes.  Create dynamics by planting varieties of different sizes and colours next to each other.

Patio

Your patio is next on the agenda. You should start by thoroughly cleaning tile and grout so as to create a fresh and welcoming atmosphere for people to unwind. According to the people from the renowned Brisbane-based Total Carpet Clean, using proper equipment will ensure that your tile and grout have the same original colour and look exactly as they did when you first laid them.

Swimming-Pool-Patio

Once the surface has been cleaned, it’s time to focus on the outdoor furniture, such as lounging chairs, tables and swings. You can either refurbish some of the existing pieces or pay a visit to your local lawn and garden store and purchase brand new items. A skillful combination of old and new can often prove to be an excellent idea. And if you want to create the impression of an outdoor room, consider adding a pergola, a roofed structure that will allow you and your friends to chill by the pool even when it rains.

Fencing and Custom Decorative Features

You can put the finishing touches to your remodeling project by adding certain decorative features, as frameless or semi-frameless glass pool fencing, balustrades, or low-profile posts with LED lighting. Choosing glass water features can really tie an already beautiful pool or outdoor setting together by formulating a delivery of class and style, we learn from the people at Dimension One Glass Fencing.

Frameless Glass Fencing

And if you want to use this makeover to also enhance your privacy, you can add privacy screens or gate alarms to your pool area. Although they now come in a variety of colours and styles, privacy screens might look a bit plain to some people, but you needn’t worry – just cover them with, say, wisteria or climbing vines and you’ll get much more natural look.

Author Bio: Lillian Connors is a blogger and home improvement enthusiast ever so keen on doing various DIY projects around her house and passionately writing about them. She is also an online marketing consultant, closely collaborating with a number of companies from all over the globe. You can check her out on G+, Facebook and Twitter.