Category Archives: Gardening Advice

How to keep your garden tidy

Your Ultimate Guide to Keeping Your Garden Tidy

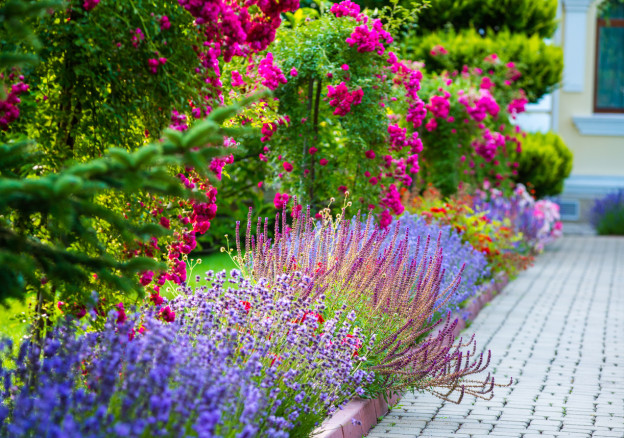
A lush garden is a beautiful addition to any home, although everyone who has one knows the importance of keeping your garden tidy and thriving. Although there is always something new to learn about gardening, novice gardeners can have more questions about upkeep than those with some years of experience. Luckily, it’s mostly about knowing when to do what. By following a few easy steps, making sure your garden stays healthy and tidy isn’t that difficult at all. Follow our tips here:

How to Plan a Garden Tidy-up

To understand what to begin with when doing a garden tidy-up, first, you need to pinpoint what it is you want to achieve. Some gardens require more work than others. If you have just moved into a new property, you might see something neglected for years. In this case, there will be loads more to tackle than when you spruce up a garden after winter.

1. Make a List of Things to Do

Start by making a list of things you want to change or take on. Doing that allows you to pinpoint specific tasks that will need doing. Also, what is it that you want to achieve? Do you want your garden to be aesthetically more pleasing? Do you want to grow flowers, fruit, and vegetables? Is it about creating an outdoor space for family and friends?  Once you have this established, look at tasks at hand.

2. Prioritise Tasks

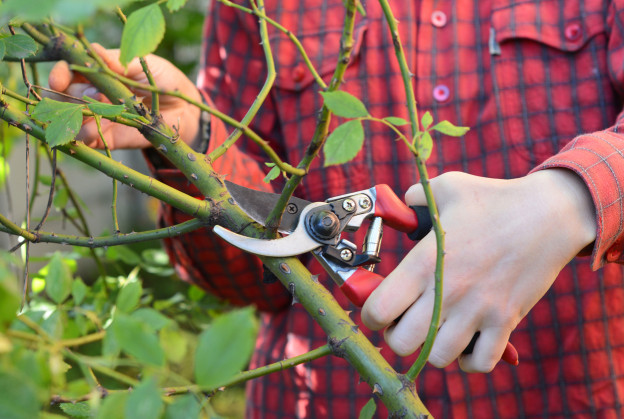
Now that you have your goals and an idea of tasks, it’s time to pinpoint, when to do what. Create a gardening calendar and fill in tasks. Different plants and flowers have a specific time when they need to be planted. Usually, you can find this information on the seed packet or consulting sales assistants in a gardening centre. Pruning can be done throughout the year, but again, it depends on the plant.

The best time to prune trees and bushes to stimulate growth is during the inactive period in winter. However, you can cut off dead wood anytime. For blooming trees, consider pruning after their spring flowers fade. If you want a beautiful lawn, consider laying lawn turf. Mid-autumn is the best time for this, however, you can do it until late winter, but before the soil is too wet or frosty.

3. Plan Your Garden Layout

Beautiful gardens are aesthetically pleasing and functional. It is much easier to do a garden tidy-up if everything is in the place it should be. Consider creating a dedicated space for different areas in your garden. If you grow fruit, vegetables, and herbs, create a patch where things would grow best. Does it have enough sunlight? Being close to the shed would also help. An area for socialising with friends and family is where you would want ornamental accents like a pond, decorative stone paths, and flowers.

Garden Tidy-Up Ideas

Simple tasks can go a long way in making your garden look pristine. More often than not, it’s all about prevention and maintenance.

  • Remove any moss or lichens from pathways, patios, stone features, and fencing.

  • Repair any damaged pathways, fences, garden furniture or any other disfigured element.

  • Tidy appearance of soil around plants by applying barks and woodchips. Mulching protects the roots, prevents moisture from escaping, and slows down the growth of weeds.

  • Introduce plants and flowers into unused and neglected areas in your garden.

  • Grow a hedge to separate your front garden from the street.

  • Add garden furniture to create a space that you and your family and friends can enjoy.

  • Create raised plant beds for growing vegetables, herbs, and fruit. Adding fresh topsoil ensures that the plants get enough nutrients.

Shed Tidy-up Ideas

Anyone who has ever had a garden shed knows that it can quickly turn into a mess that resembles a drawer, where you chuck everything that doesn’t have a place anywhere else. Keeping your garden shed tidy is one of the most important tasks as it will make the whole process of tidying up your garden much easier.

To tidy up your shed organise everything and put it in the appropriate place. Make sure the garden hose doesn’t have any knots and is rolled up nicely. Any long gardening tools like shovels, hoes, and rakes should be hung up. Have a dedicated space for pruners, shears, and other tools you use regularly. Ensure that all equipment is clean and dry after use, and put it in its designated spot.

Keeping Pond Water Clear

If you have a pond in your garden, remember to take care of it too. Ponds that are taken care of are a beautiful addition to your garden, but neglecting them will repel you or anyone else to go near them due to murky water or even smell.

The best time to clean the pond is in late autumn. If you have any fish or other creatures, they will be less active during this time. When changing the water in the pond, carefully remove any fish or other creatures into tanks. Before filling the pond up again, clean the surface liner with a brush.

During the summer, remember to top-up water levels if they drop during hot weather. Remove any floating weeds or leaves, or other debris. Every now and then spray some fresh water on the pond surface to improve oxygen levels and break the surface.

simple gardening tips

23 Simple Garden Ideas with Maximum Impact

Looking for some simply gardening ideas which will add a touch of effortless style to your garden and make the most of the space?

We’ve got you covered!

We’ve gathered together our favourite garden design ideas that will give a new lease of life to your space, whether you only have a tiny patio or a larger backyard or garden.

Unleash your creative side with these projects and you’ll really maximise those lush greens and gorgeous colours and your garden will look effortlessly stylish and well-designed too.

We promise you won’t need to fork out too much of your hard-earned cash or spend hours getting it all done either. Enjoy!

Backyard ideas

1. Set up a potting station. Why feel embarrassed about that unsightly pile of plant pots, potting soil and garden tools hiding in the corner of your garden when you could make it look pretty? Grab a small table which fits your garden design, weatherproof it and be proud of your creativity.

2. Create a DIY fire pit. Create a stylish focal point for your garden without breaking the bank by using circular and square paving stones. Perfect place to socialise any time of year!

3. Use rope lights to light up your paths. Inexpensive rope lights make a stylish and quite magical addition to any garden. You just need lights, garden staples and you’re done!

4. Get creative with your planters. There’s no need to stick with unimaginative brown planters when you could find something beautiful instead. We love to repurpose everyday items such as metal milk jugs, used tyres, teacups and bowls, and much more.

5. Invest in a hammock. We all love sitting back and relaxing back in a hammock, especially when the summer days are long. So why not find the perfect design for your garden and unwind!

6. Create a new path. There’s nothing like a brand new path built with scrap wood, decorative stones, high-quality wood chips or gravel to create a high-impact feature in your garden that is functional too.

7. Add decorative bark and woodchip to create a focal area. Sick of looking at the bare soil between your plants? Cover it with decorative bark and let your flowers to shine whilst also retaining moisture and keeping your soil healthy.

8. Use a trellis. Used cleverly, trellis can divide your garden space, hide parts you’d rather not see, and also provide a great space to grow your climbing flowers or vegetables.

9. Add mirrors. Mirrors make a great addition to any garden space as they help maximise the amount of light, create the illusion of beautiful design features and also look stunning.

10. Gather planters in one place for maximum impact. Soften the edges of your backyard and create a sense of fullness by grouping your planters together. Think colour, height and sunlight requirements to get the best from your plants.

11. Create a wildflower meadow. Attract more bees, butterflies, insects and birds, and get your garden looking gorgeous by adding a wildflower area to your garden. Simply scatter some wildflower seeds or buy some wildflower turf to create a look that adds impact even the smallest of gardens.


Patio design ideas

12. Add string lights. Hang string lights over your pergola, around the trees, and wherever else takes your fancy to add ambience, style, or just that finishing touch.

13. Decorate the back wall. An easy way to create maximum impact on your patio is to get creative with the back wall. Add paint, add your favourite art, add bespoke tiles, textures or even artificial grass for a creative look with a difference.

14. Get creative with pocket planters. If space is tight but you still want to grow as much as you can, get your hands on some pocket planters. They’ll make maximum use of the available space and at the same time add a splash greenery to your patio.

15. Create a mini herb garden. You don’t need a massive garden to enjoy the gorgeous scent of freshly grown herbs. Simply find planters which fit with your design scheme and fill them with whichever herbs you love most.

16. Switch your cushions. Bring a new lease of life to your patio and up the comfort factor by investing in some colourful new cushions, the brighter the better.

17. Get some hanging baskets. Did you know that you can grow pretty much anything you like in hanging baskets? We don’t mean just flowers either. We love growing cherry tomatoes, aubergine, peppers, and even lettuce in ours. What could you grow?

18. Update your garden furniture. You don’t need to break the bank to update your patio with new garden furniture. Keep your eye out for small pieces in second-hand stores or repurpose what you already have to create impact for less.

Garden Projects

19.  Create tealight holders. Light up your garden by creating your own tealight candle holders from used tin cans. Simply hammer a simple pattern in the exterior with a small tool and let the light seep through. Beautiful!

20. Paint your flower pots. Get out your paint brushes and give your plant pots a facelift. You’ll create something unique, you can tailor your design to fit your overall garden design, and it’s a fab, fun project that the whole family can get involved in.

21. Reshape your flower beds. Liven up your garden and add a the finishing touch of a pro gardener by adding some shape and design to your flower bed. Edge with cinder blocks, glass bottles, scrap wood or wooden logs and your garden definitely won’t look boring anymore.

22. Create a raised bed for your produce or flowers. Raised beds are an excellent garden design feature that will help you grow healthier plants, keep away weeds and have better control over the soil quality. Build your frame using wooden planks, add high-quality bespoke topsoil and voilá.

23. Treat yourself to a lawn. Yes, keeping a lawn looking great does take some work, but the effort will certainly pay off, especially if you get creative with your shaping. Start with a high-quality topsoil and packet of grass seed, or invest in ready-to-lay turf and you’ll have a lawn to be proud of.

So next time you’re looking for some backyard design ideas, patio design ideas or just a general gardening project to get your teeth into, come back to this list of simple gardening ideas and get creative.

summer-gardening-tips

A Summer Gardening Checklist for July: Time for TLC

Looking for a quick gardening checklist for July? Then you’ve come to the right place!

During these summer months, your garden is absolutely bursting with colour and life. Your flowers are blooming, your fruits and vegetables are producing abundant quantities of fresh produce.

The bees are gently buzzing around…The butterflies drift from flower to flower…

It’s all looking gorgeous!

You know that you need to put some work into your garden if you want to keep it looking this beautiful. But you don’t necessarily want to be sweating away under the midday sun to make this happen.

That’s why we’ve put together this incredibly efficient gardening checklist for July.

Work your way through and you’ll get those vital gardening tasks done this summer and still have plenty of time to enjoy the fruits of your labour.

#1: Give your soil some love by adding compost

Those higher summer temperatures can really take their toll on your soil quality, so give it a boost by digging in plenty of nourishing compost this July.

You’ll help keep that vital moisture in your soil, you’ll grow better produce, your flowers will grow strong and healthy, and you’ll have a garden you can be really proud of. Best of all, you won’t need to use expensive chemical fertilisers or other products to achieve it.

Don’t forget to repeat during the autumn to ensure you produce healthy plants all year around.

#2: Get rid of those weeds!

Those pesky weeds don’t just make your garden look untidy. They also steal water and nutrients from the soil, attract pests and harm your growing garden.

Worst still, weeds love sunshine and grow strongly during the summer months so it’s really important to enough time spend time getting them under control this July.

Yes, even if weeding is your least favourite garden care task.

Doing it now will save you time in the long run because it’ll reduce the seeds that they produce and so you’ll reduce your workload when autumn and winter come around.

(Quick tip: water the soil first to help those weeds slip out more easily!)

#3: Set a clever watering schedule

 Higher summer temperatures can cause your soil to get pretty dry and lose vital nutrients, not to mention it can do to your beloved plants. So make it part of your routine to water your garden regularly and keep your garden thriving.

But beware- you can’t just water anytime the urge takes you. You could risk damaging your plants in the higher summer temperatures if you don’t set a water schedule.

Stick to watering your garden in the early morning or evening when the sun is weaker, and also be careful not to drown them. Also, make sure you’re watering directly to the ground, not over the plant itself so you don’t risk burning your precious plants.

#4: Give your garden a facelift using aggregate stones

 The summer months are perfect for giving your garden a new lease of life using aggregate stones or decorative stones.

These gorgeous garden decorations won’t just add a splash of colour, add texture, or give your garden more of a designed look. They’ll also cut down significantly on your gardening workload, they’re very low maintenance, they help control weed growth and improve soil quality and they won’t break the bank either! Perfect!

#5:  Pick your fruits and veggies

 Most of your tasty fruits and vegetables will be producing their crop during the summer, so make sure you enjoy them!

Pick as much of your fresh, nutritious produce as you can and find clever ways to use it all. This might include trying delicious new recipes, donating any excess to your friends and neighbours or even bartering for items that you might like instead.

Whatever you do, don’t leave your produce there rotting and attracting flies, rats and other pests.

So this July, make sure you really enjoy the garden that you’ve worked hard to create.

Enjoy the fruits of your labours, spend plenty of time enjoying the sun and the outdoors, and follow this easy gardening checklist to keep your garden looking great all year around!

Mixed Race Couple Planting Rooftop Garden Together

6 Simple Tips for Urban Gardening

Urban gardening is awesome.

It allows you to grow delicious and nutritious fresh vegetables and herbs in the smallest of spaces, and you’ll have so much fun whilst you do it.

Whether you’re looking in bring a splash of greenery to your balcony or window box, or you have a tiny yard that you want to make productive, you’ll love how easy it is to grow your own with urban gardening.

You’ll also save money on groceries, reduce your carbon footprint and do your bit for sustainability. What’s not to love?

Here are our top tips for getting the best out of your urban gardening project.

1.    Find the sun!

 Before you start creating your urban garden, first think about how many hours of direct sunlight your growing space gets each day. Your plants need the right conditions to be as healthy and productive as possible.

Based on this information, you can then choose the right plants to grow in your space. (Check the back of your seed packets if you’re unsure.)

2.    Use containers or raised beds

Containers and raised beds are great options for beginner gardeners, especially if you’re working with small spaces like balconies, city gardens, and small backyards.

You’ll have more control over your soil, you’ll better protect your baby plants from the elements and you’ll be able to keep producing vegetables late into the season.

Containers also make it much easier to keep those pesky weeds in check and make access to the garden much easier. Double win!

3.    Compost!

 As a gardener, compost is your best friend – whether you chose to make your own or buy in store, it offers many benefits to your crop and the environment. Compost helps reduce your carbon footprint, help nourish the soil and ultimately, create tastier, healthier veggies.

Just collect your fresh food waste and garden waste, pop them into a composting bin, and within a few months, you’ll have a ton of ‘black gold’ you can use to grow your crop.

4.    Start with the easiest crops

 When you’re just getting started with urban gardening, it’s best to opt for vegetables and herbs which grow well in your local area. That way you won’t get overwhelmed with complicated growing techniques, but instead feel extra-motivated when you start munching on fresh produce you’ve grown in your very own urban garden.

Tomatoes, herbs, peppers, cabbage and lettuce are usually the best plants for beginners.

5.    Water them! But not too much…

 Remember that you’ll need to water your crop regularly for them to be healthy.

But don’t be tempted to overdo it. If you leave them drowning in water all day, they could fall victim to root rot and die before they produce anything. Instead soak the container with plenty of water, then allow the rest to drain through.

[If you have trouble remembering to water your urban garden, let technology help. Set a reminder on your phone and you’ll never forget again!]

6.    Grow vertically

 If you’re only got a teeny tiny yard or balcony where you can start your urban gardening project then consider vertical gardening.

Use netting and frames for vegetables like cucumbers, beans and tomatoes. Grow carrots or potatoes in deeper containers with holes in the sides. Or create clever shelf or stacking systems for lettuce and herbs so you can make the most of the space you have.

 Don’t let lack of gardening space deter you from starting your urban garden! You can still grow plenty of fresh produce if you’re clever about how you do it. The small effort is absolutely worth it.

So whether you have a balcony, city garden or small backyard, get growing!

Barbecue grill with fire

5 tips for Preparing your Garden for Outdoor Entertaining

From caring for your plants and flowers to clearing up your patio area, our advice will guide you in creating the perfect summer garden your guests will love. Before you start thinking about your guest list and the BBQ menu, you should consider how you can get your garden ready for outdoor entertainment.

1.Embrace summer bright colours:

Early June is the perfect time to pull your garden from the depths of winter and embrace lighter colours for summer. Add colour to your garden by choosing vibrant plants, flowers and painting your shed. If that sounds like too much work, why not invest in colourful garden pillows and add mirrors to your garden to give the illusion of space.


2.Ensure optimal growing conditions for plants and flowers:

A garden in full bloom is the perfect location for your summer entertainment whilst also providing an ideal backdrop for photographs with family and friends.

Make your beautiful array of flowers the talking point of your party by ensuring they have all the necessary conditions to bloom throughout the summer months. This includes supplying flower beds with enough water, protecting against snails and ensuring your soil is rich with nutrients. Our extensive range of soil conditioners are perfect to give your soil that extra nutritional boost they have been craving.

3. Nourish garden lawn with fertilisers and mow garden lawn:

Looking for luscious green lawn similar to the one on the front cover of gardening magazines, but left it a little too late to replicate one of your own? At Bury Hill, we stock lawn turf which can help transform your tired lawn into a vibrant lawn in mere hours. This will create the perfect play area for younger guests.

4. Clean up the patio:

Often your patio area can become overlooked after a long winter.  Freshen up your stone or tiled patio before your next BBQ by power-washing to remove excess grime and weeding to prevent overgrowth.

Looking for a complete overhaul? Take a look at our extensive range of aggregates. These stones are a fantastic way to add an unusual touch to your garden patio, which your guests will love.

5.  Invest in garden furniture:

Investing in new garden furniture and accessories can transform your garden space from uninviting, to warm and friendly. For summer BBQ’s we recommend investing in statement furniture pieces that will add a touch of style to your summer entertainment. Consider pastel pillows and woolen throws for added comfort during those long summer evenings.

For more information on how to create your perfect garden for summer entertainment, contact us here.

Bumblebee pollinate or collect nectar on blue flower at golden sunlight in sunset time

How to Create the Perfect Bee-Friendly Garden

Bees are vital pollinators and welcome visitors in any garden to maximise the distribution of nectar and to encourage plant growth. As bees pollinate many of the plants we eat, by helping bees we in turn help ourselves and our environment to flourish.

You can encourage pollinating insects to visit your garden by providing food, shelter and water. At Bury Hill, we have combined a list of our favourite tips to help you create your very own bee-friendly garden.

1.Best plants for bees:

Finding the right plants for bees is easier than you think – with thousands of possibilities available, you are guaranteed to find a suitable bee-friendly plant for your garden at your nearest centre. These include:

  1. Mint
  2. Oregano
  3. Lavender
  4. Lily of the Valley
  5. Witch-hazel

Top tip: Bees notice the colour purple in particular, so integrate purple foliage into your beds and borders where you can.

   2. Bee-friendly flowers:

Bees are most attracted to bright, brash blooms which give out an alluring scent.

It is important, however, to select a range of flowers that will extend beyond the flowing period to encourage bees to visit your garden all year round.

Single flowers that are rich in pollen and nectar are perfect for visiting bees. These include:

  1. Sunflowers
  2. Wildflowers
  3. Blue Geraniums
  4. Agastache
  5. Snapdragon

To create optimal conditions for plant growth, add soil conditioners to your soil. This will ensure that your plants are supported and receiving the necessary nutrients they need to grow and to support bees.

     3.Plant strategically:

Plant flowers in suitable locations to maximise how bees interact with your garden. Our top tips for strategic planning include:

  • Growing plants in blocks
  • Plant throughout the seasons to provide food
  • Allow grass to grow to ensure there is maximum amount of shelter available.

Creating an ideal environment for bees to visit and enjoy is key. Follow these steps for visible results.

4. Create bee houses:

Bees create homes in a variety of locations across the garden. Places include long-grass, in the eave of a roof and inside a tree. Left to their own devices, beehives in the garden can become troublesome, but there are alternatives which you can manage.

Why not create your own bee hotel to encourage bees to visit your garden? Made from waste wood and logs, bee houses can be made relatively cheaply but with maximum impact for your garden.

Place the bee house in a corner of the garden that is sheltered from adverse weather conditions but with access to sunshine. Position the bee house in a south-facing position if you can, but not in the way of direct sunlight. This will provide bees with the best possible conditions and encourage them to visit your plants and flowers.

5. Bee conscious:

Be aware of bees coming to your garden and ensure you provide optimal conditions for them in your garden. This consciousness can include everything from reducing the amount of chemical pesticides and fertilisers you use, to allowing parts of your garden to grow wild. As some weeds are a rich source of nectar and pollen, allowing them to grow in parts of your garden will be beneficial to bees. Reducing the amount of times you cut the lawn will allow more lawn flowers to grow, providing a fantastic feeding opportunity for bees.

For more information or to speak with a member of our team on how to create your perfect bee garden, contact us here.


bring your grass back to life

How to bring your lawn back to life in 5 easy steps

Bringing a lawn back to life after a long stint of cold, damp weather is a hugely rewarding but challenging process. As a general rule, when the first signs of spring begin to appear, it’s time to focus your attention on the lawn to get it primed for summer.

So, if your lawn is looking a bit patchy or brown, and sunshine alone won’t bring it back to full health, follow this guide to get it looking like a key feature to be proud of once again.

Bring your lawn back to life in 5 easy steps

1.Get rid of winter weeds and dry blades

Dead, dry blades, fungi and moss can all build up on our lawns during the winter and extended cold spells. Snow mould in particular only rears its head during extreme weather, so watch out for that in your garden. It’s time to get your wire rake out of the shed to get rid of this debris to make way for spring growth and reseeding if necessarily. Think of this raking, otherwise known as ‘scarifying’ the lawn, as exfoliating your lawn of the dead cells and dirt to celebrate the spring season.

2. Reseed to freshen up a sparse lawn

Shaping your lawn from seed is inexpensive and straightforward. Whether you are sowing seed to start from scratch or fill in patchy areas on an existing lawn, sowing is a much cheaper option for larger spaces – just don’t get expect instant results.

The right watering strategy is key: water your existing lawn well, sow your seeds and don’t water again until you begin to see the shoots coming through. Watering too early risks washing the seeds away and increases the chance of mould setting in.

How To Sow Grass Seed – A Complete Guide

3. The more your mow, the thicker your grass will grow

As soon as the cold winter snap seems to be over, and your grass seedlings are dry and established, start mowing at least once a fortnight in spring and once a week in summer to prompt full and thick regrowth. Remember to collect your clipping to store in a your compost bin. If you don’t have one, a thick black bin bag will do!

4. Feed your lawn regularly

Nothing brings existing foliage in the garden back to life like a good quality feed. Some feeds are designed specifically for the lawn, which are great if your lawn is moss and weed-free, and others have added ingredients to kill unwanted fungi, weeds and moss for quick results. Some are designed for the spring to promote new growth, and others are for toughening up your autumn grass in time for winter.

Not all feeds are pet-friendly, so check the packaging beforehand or ask the supplier. Chemical-free weed killing alternatives include boiling water – which may also affect your grass so it’s not ideal – vinegar, salt and sugar.

Whatever feed you choose, spread from April through to September for extended growth and health. Try a liquid feed from later spring into summer to feed as well as moisten your lawn during dry spells, then opt for a gentler feed which is low in nitrogen in autumn which won’t speed up growth and leave new shoots susceptible to winter frosts.

5. Aerate your lawn in late spring and early autumn

Your lawn can becoming compacted through use and different weather conditions, which restricts the absorption of air, water and nutrients at root level.

The concept and process of aeration is simple: take a strong, long-handled fork out of storage, put on a pair of boots or wellies with thick soles and use your weight to dig the fork down into the lawn to create small holes. Leave a set of holes every two feet or so until the entire lawn has been aerated.

Your work will stimulate new growth, improve water drainage and de-compact your lawn below surface level. Timing is key: aim to aerate in late spring and early autumn, when your lawn is established but when very hot weather hasn’t made the soil dry and hard to dig.

Why, How and When to Aerate a Lawn in the UK

Revive your lawn this spring with Bury Hill

Now’s the time to invest in a high-quality grass seed mix that has been blended for your specific use. Bury Hill supplies Limgrain grass seeds which have been treated with a transparent coating made from seaweed extract which ensures fast germination and strong root growth.

Find out about our package options and delivery prices by clicking through to our Grass Seed page.

child-friendly gardening checklist

Child-friendly gardening checklist for spring

It’s always exciting to see our gardens wake up once again after a long winter slumber. Spring is an active season for plants and gardeners in the UK. It’s a great time to inspire the next generation of gardeners to get outside and lend a hand to start growing their own flowers, fruit and veg.

Spring is a time for sowing seeds, watching wildlife and maintenance in the garden. A cool breeze may be lingering, but the garden still needs tending. We’ve put together the following guide, which lists child-friendly jobs, planting and activities by month to help your whole family enjoy your garden space.

March

Spring has sprung, busy days have begun!

Jobs to help with

Regular bug watches! Keep an eye out for slugs and snails

Cover bare borders with good quality topsoil

Rake up leaves and stick them in your compost bin

What to plant

It’s time to get summer bulbs in pots for summer colour

Sow herb seeds thinly in a tray or large pot

Sow lettuce seeds early indoors

Clear an area for wildflowers then spread a wildflower seed mix

Clear weeds to sow hardy annuals, like ‘Ladybird’ poppies

April

Prepare for April showers and sunshine

Things to do this month

Dig in a 5cm layer of good quality topsoil along borders

Help plant hanging baskets with bright blooms

Keep on top of weeds! Spread woodchip if needed

Continue your good work

Plant herb seedlings into separate pots or into the soil

Water your newly-planted fruit trees regularly

Add a soil conditioner before summer planting

Tie tomato plants to stakes for straight growth

Look out for frogs and frog spawn in the pond

May

A marvellous month for green fingers!

Now’s the time to

Find a good soil conditioner to break up heavy soil

Begin picking lettuce leaves for lunch!

Bundle herb sprigs into drawers for freshly-scented clothes

Spring sowing and planting

Sow sunflower seeds in a sunny spot outdoors

Pick a spot on a fence or wall for wallflower plants

Plant delicate indoor seedlings outdoors

Gather the first flowers of spring into a lovely bunch

3 ways to attract wildlife into the garden

Make a dark, warm hedgehog hotel using a wooden crate filled with leaves left turned upside down, with a small air hole and an entrance.

Place a small strip of carpet, or any other thick fabric, along a border to attract slow-worms. Often mistaken for baby snakes, these lizards are becoming an increasingly rare sight in the UK.

Create a makeshift bird feeder by stuffing melted fat or lard (an adult must be present) peppered with nuts and seeds. Finally, attach some rope to the container and hang it from a tree that is in plain sight from your house.

Make your garden look and feel great in time for spring with a nutritious topsoil and soil conditioner. All our premium grade topsoils and loams are blended using high-quality natural soils, selected sands and grits and organic compost from known sources, using local materials where possible. If you would like to place an order, visit our topsoil delivery information page.


Money-Saving Gardening Tips

10 Money-Saving Gardening Tips Part two

Last year, we took you through our top 10 money-saving gardening tips for our thrifty customers, from money management to researching your landscape supplier properly. However, a gardeners work is never done, and every season presents fresh opportunities to plan ahead! So, if you’re a beginner looking to cut costs or you need a tips top up, you’ve come to the right blog.

1. First, preserve leftover seeds

Seed packets may be small on size but many are big on price – the rarer or more popular the flower, for example, the more expensive they are to grow from seed. One of the easiest ways to cut down on seed expenditure every year is to store all your packets and leftover seeds (because you will always have some left over). Airtight plastic containers and glass jars are best, in a cool dry area away from direct sunlight.

2. Or, collect seeds to use again next year

Collecting flower and vegetable seeds at the end of their growing season will keep your seed collection topped up every year without having to head to the gardening centre. It’s not difficult to do, and some plant seeds are easier than others to harvest. Here’s a quick list of seed-saving vegetables to consider:

  • Peppers

  • Melons

  • Squash

  • Aubergines

  • Cucumber

  • Tomato

The smaller the seed, the bigger the hassle. But trust us, storing home-grown seeds is very satisfying – and frugal!

3. Learn how to take and grow cuttings

You don’t have to wait until a flower or fruit has lost its luster until you can start creating money-saving tips. As soon as plants begin to grow additional stems and shoots, there’s potential to take cuttings to grow on, sell or barter with friends. Here’s a quick tree cuttings guide, for example, to note:

  • Softwood cuttings: late spring, early summer

  • Semi-hardwood: midsummer after flowering

  • Hardwood: end of summer

4. Buy mulch in bulk

If you’ve decided that you’re a minimalist gardener – more interested in materials and practicality- consider using attractive materials in bulk like woodchip and bark to spread around the garden. Bulk buying is often a cheaper, easier and quicker solution for this type of garden project.

5. Shop comparitably

There are plenty of online comparison sites to choose from, selling everything from garden furniture and features to tools and lawnmowers. So shop around to find the cheapest prices on the market, alongside seasonal deals and sales.

6. Avoid overplanting

It’s easy to burden a big flower or vegetable bed with too many plants all at once to achieve a mature, lively scene straight away. As a rule, start with the bigger plants at the back and work your way forward in size until you reach the front, leaving enough room around each plant so they’re not constantly competing for light and nutrients.

7. Test your soil

If you go on a spending spree before testing your soil – what nutrients your soil lacks and its pH – your plants may not be suited to the conditions and will eventually wither, no matter how much you feed them. Test your soil and plan a planting scheme accordingly, like you would with shady and sunny spots in the garden. Consider using specialist soils to give your beds a boost.

8. Try natural, DIY feeds

We’re big fans of trying natural products in the garden when you can. Our pH-neutral organic soil conditioner, for example, is used by customers who want to improve their soil without potentially damaging chemicals.

Natural options to include in the garden include:

  • Making your own weed killer

  • Making your own compost

  • Save your grass clippings to use on your lawn as a DIY feed

9. Get free advice or speak with an expert

If you’re looking for extra ways to be creative in the garden, there’s a wealth of free knowledge online, at your local library or in free magazine supplements to get you started. Alternatively, as we pointed out in our earlier post, investing an hour or so with a landscaping expert to discuss your project to avoid mistakes is often good value for money over the long-term

10. Finally, use water wisely

Rather than add to your water bill during the summer when tending to your garden, collect water from other sources where you can. Installing a water butt, or leaving open containers around the garden to collect rainwater, is quick and easy. Additionally, watering directly on the soil rather than higher up on the leaves ensures water goes to where it is needed and adding two to three inches of mulch to your soil locks in moisture for longer.

For more even more evergreen tips on how to keep your garden looking great for less, revisit our first money-saving blog.

If you’re interested in any Bury Hill product or service listed in this blog, please call our team on 01306 877 540 for more information, or use our postcode delivery finder to receive an estimated price for your order.

Loam Soil – Everything You Need To Know.

Loam soil means your garden will flourish

For those of us who simply want to pot some plants, to plant some shrubs, and flowers and keep our gardens looking neat and tidy, sometimes gardening can be tricky. It can quickly become overwhelming when we’re faced with gardening terms and decisions such as which soil is best, and all the things we need to do to ensure our gardens stay healthy.

While you don’t need a degree to be a good gardener, educating yourself on some aspects will help you to make sure that your garden flourishes.

One of the most basic rules of gardening is that if you want your plants to do well, you need great soil to plant it in.

This is where you may have heard the term loam soil come in.

Loam soil is what many gardening experts say you should aim for as it provides optimum conditions for most plants and flowers to grow in.

Good soil is soil that contains a healthy mix of plant boosting nutrients, that has good drainage but also retains moisture well enough that roots get a chance to suck it up, that is moist and crumbly but neither too wet or too dry, too clumpy or too soft! Yes getting the perfect soil can be tricky.

Loam soil is the ideal for growing most plants. It usually contains

- around 50% sand,
- 30 – 50 % silt, and
-10 – 25% clay

These numbers don’t have to be exact. As long as there is the same amount of sand and silt with about a 10th to a quarter of the soil’s makeup being clay, you should have a good enough mix for plants to thrive.

The reason why this mix works is that sand particles help to keep the soil loose, they are the largest of the three particle types and break up the soil well making it easy to work with. They also don’t hold onto too much moisture thus making it easy for water to drain right through the soil when it rains, or you choose to water your garden.

Clay particles are very small, however, they retain moisture far better, therefore are needed to ensure your soil stays moist enough that plant roots can access the water within it.

Silt particles help to mix the two.

The mix of particles in loamy soil means that it is rich in nutrients too, this keeps the soil healthy, and healthy soil means healthy plants. The pH balance is near to neutral, and the consistency of loam soil allows for lots of movement, so water, air and nutrients can move freely within it, again resulting in those hungry roots being easily able to reach what they need.

How do you know if you have loam soil in your garden?

Some lucky gardeners already have loamy soil in their gardens. It’s easy to test whether you have by picking up a handful of your garden soil and squeezing it between your fingers. If the sand content is too high the soil will sift through your fingers, too much silt and the soil has a more powdery consistency, too much clay and it will feel sticky and won’t absorb water well.

If you have loam soil, you should be able to form a loose ball of soil in the palm of your hand.

I don’t have loam soil – how can I create it?

You’d think just by adding more sand, silt or clay to your soil would result in loamy soil in your garden. Unfortunately, it doesn’t work like this.

To achieve loamy soil, you must carefully and consistently tend to your garden. Working in some good quality organic matter each season to your existing soil will help you choose the optimum soil conditions for your garden.

Alternatively, for a fast solution, you can buy loamy soil to add to your garden for instant and impressive results.

At Bury Hill, we pride ourselves on providing a fantastic range of loamy topsoils which can be ideal to help your garden flourish. So whether you are a novice gardener or have been doing so for years, why not browse our great variety of premium grade topsoils and loams to give your green space a real boost in time for next years planting season?